
Create a virtual Hacking Lab on Apple Silicon Mac
When you are a cyber security consultant, a pen tester or even a system operator with technical interest then you want to perform attacks on systems to understand exactly how hackers work in real life and which vulnerabilities are exploited in order to take control of the system. If you know how hackers attack your system, you can protect it better.
Under no circumstances should you start attacks on systems located on the internet, even if the systems belong to you, because from a legal point of view it is always a risk and you can get into trouble. You should build a game environment in your local network in which you install attacker and victim system. It is important that you only use private IP addresses and that the game environment does not route any data traffic to and from the Internet. This gaming environment is then your Hacking Lab in which you can try out different attack scenarios safely and securely.
The idea is to install a virtualization software on the operating system of the host computer which is in my case an M2 Apple Mac with Ventura 13.3. The virtualization software I use is UTM. UTM create the virtual guest machines in a virtual Lan (Vlan) isolated from the host operating system and the local network. The virtual guest machines can talk to each other but can not access the local network or the internet via the host. The host can talk to the virtual guest machines. This network mode is defined as host only mode.
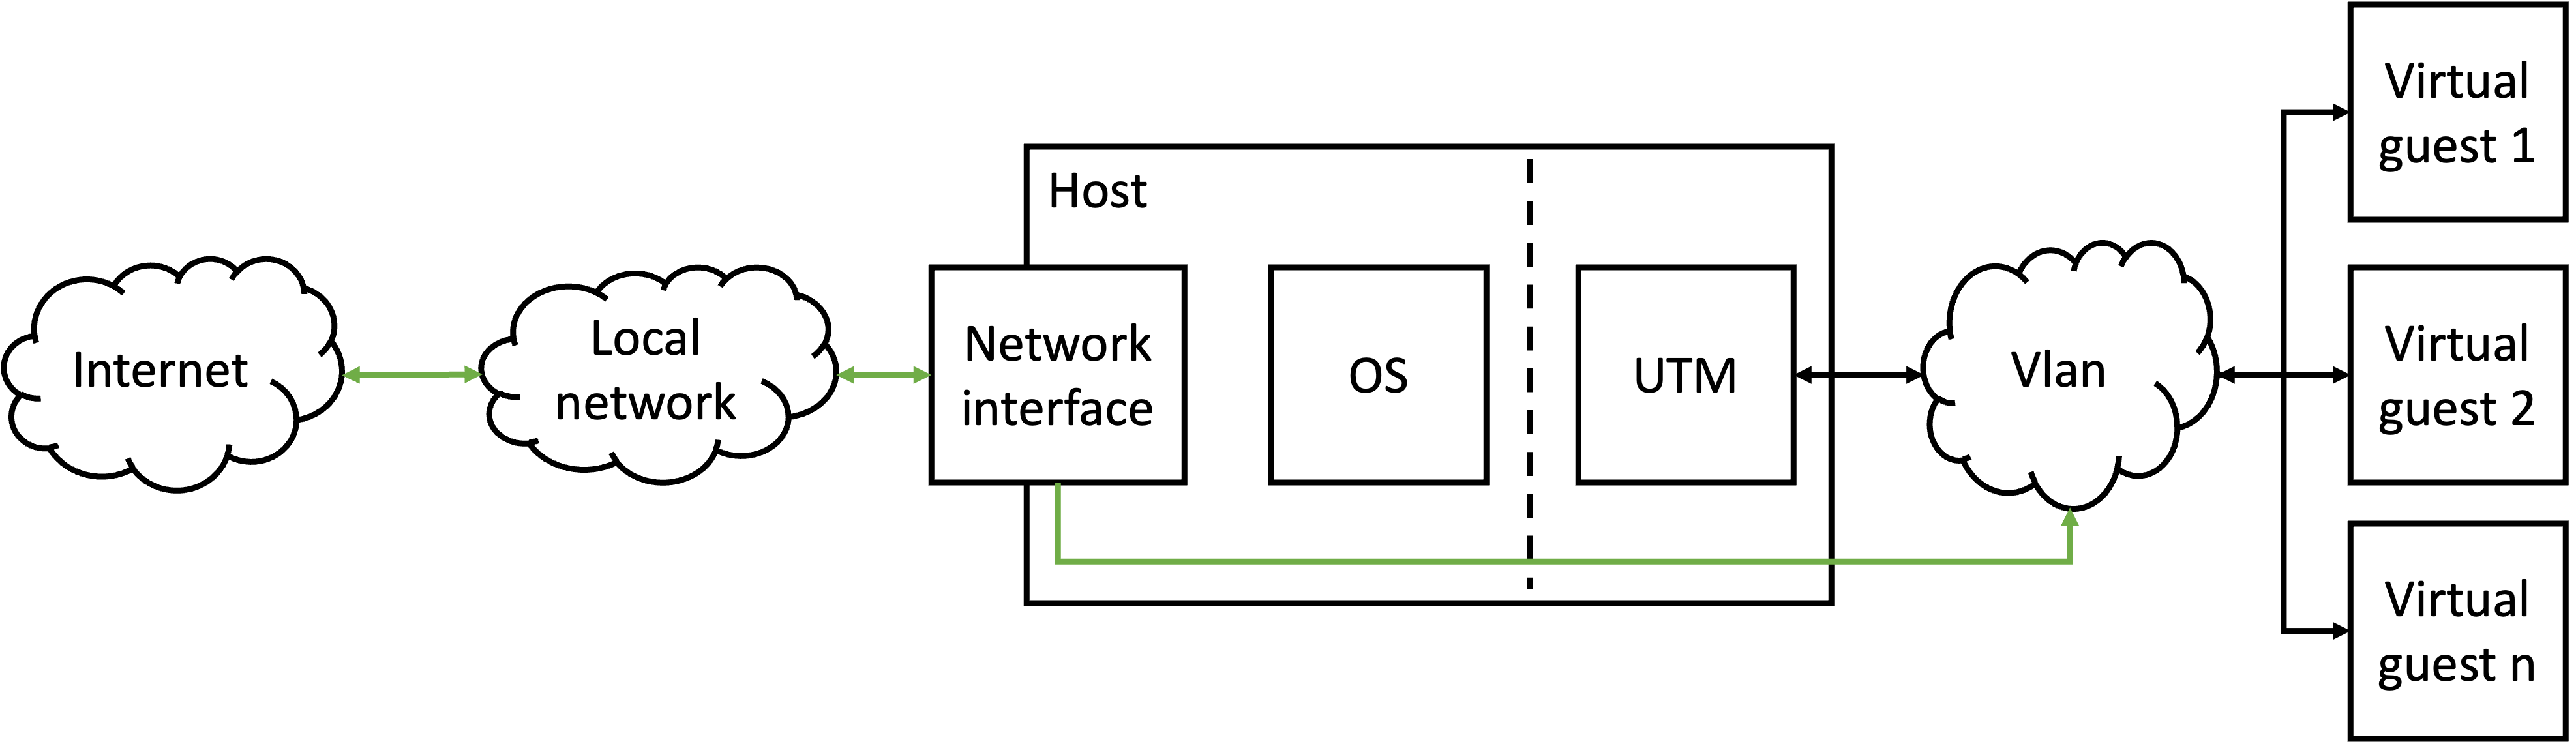
Note: UTM provide various network operating modes. Details can be read in the UTM documentation.
The installation of UTM can be done in two ways:
I recommend to install the payed version from the App Store. You will get all updates whenever there are updates available and you support the development of this fantastic tool. At the time of writing this article the costs for the payed version of UTM were 11.99 Euro.
Once UTM has been installed we need to create the attacker and the victim as virtual guest machines in UTM. The attacker is a Kali Linux Image the victim will be a host prepared with vulnarabilities from vulnerable hub.
On vulnerable hub you find vulnerable virtual machines. These machines are prepared from cyber security enthusiasts for other security enthusiasts. These machines are available with vulnerabilities and created specifically for the purpose of hacking them.
Create a vulnerable virtual machine in UTM
To create a victim in UTM you search for a machine which best suits your needs and download the virtual machine from vulnerable hub which is available there in the .ova format. OVA is basically a tar based archive that contains among other things, an .ovf file with the specification of the virtual machine and in most cases disk image files in the format .vdi and .vmdk. Other files contained in the .ova file we don’t consider.
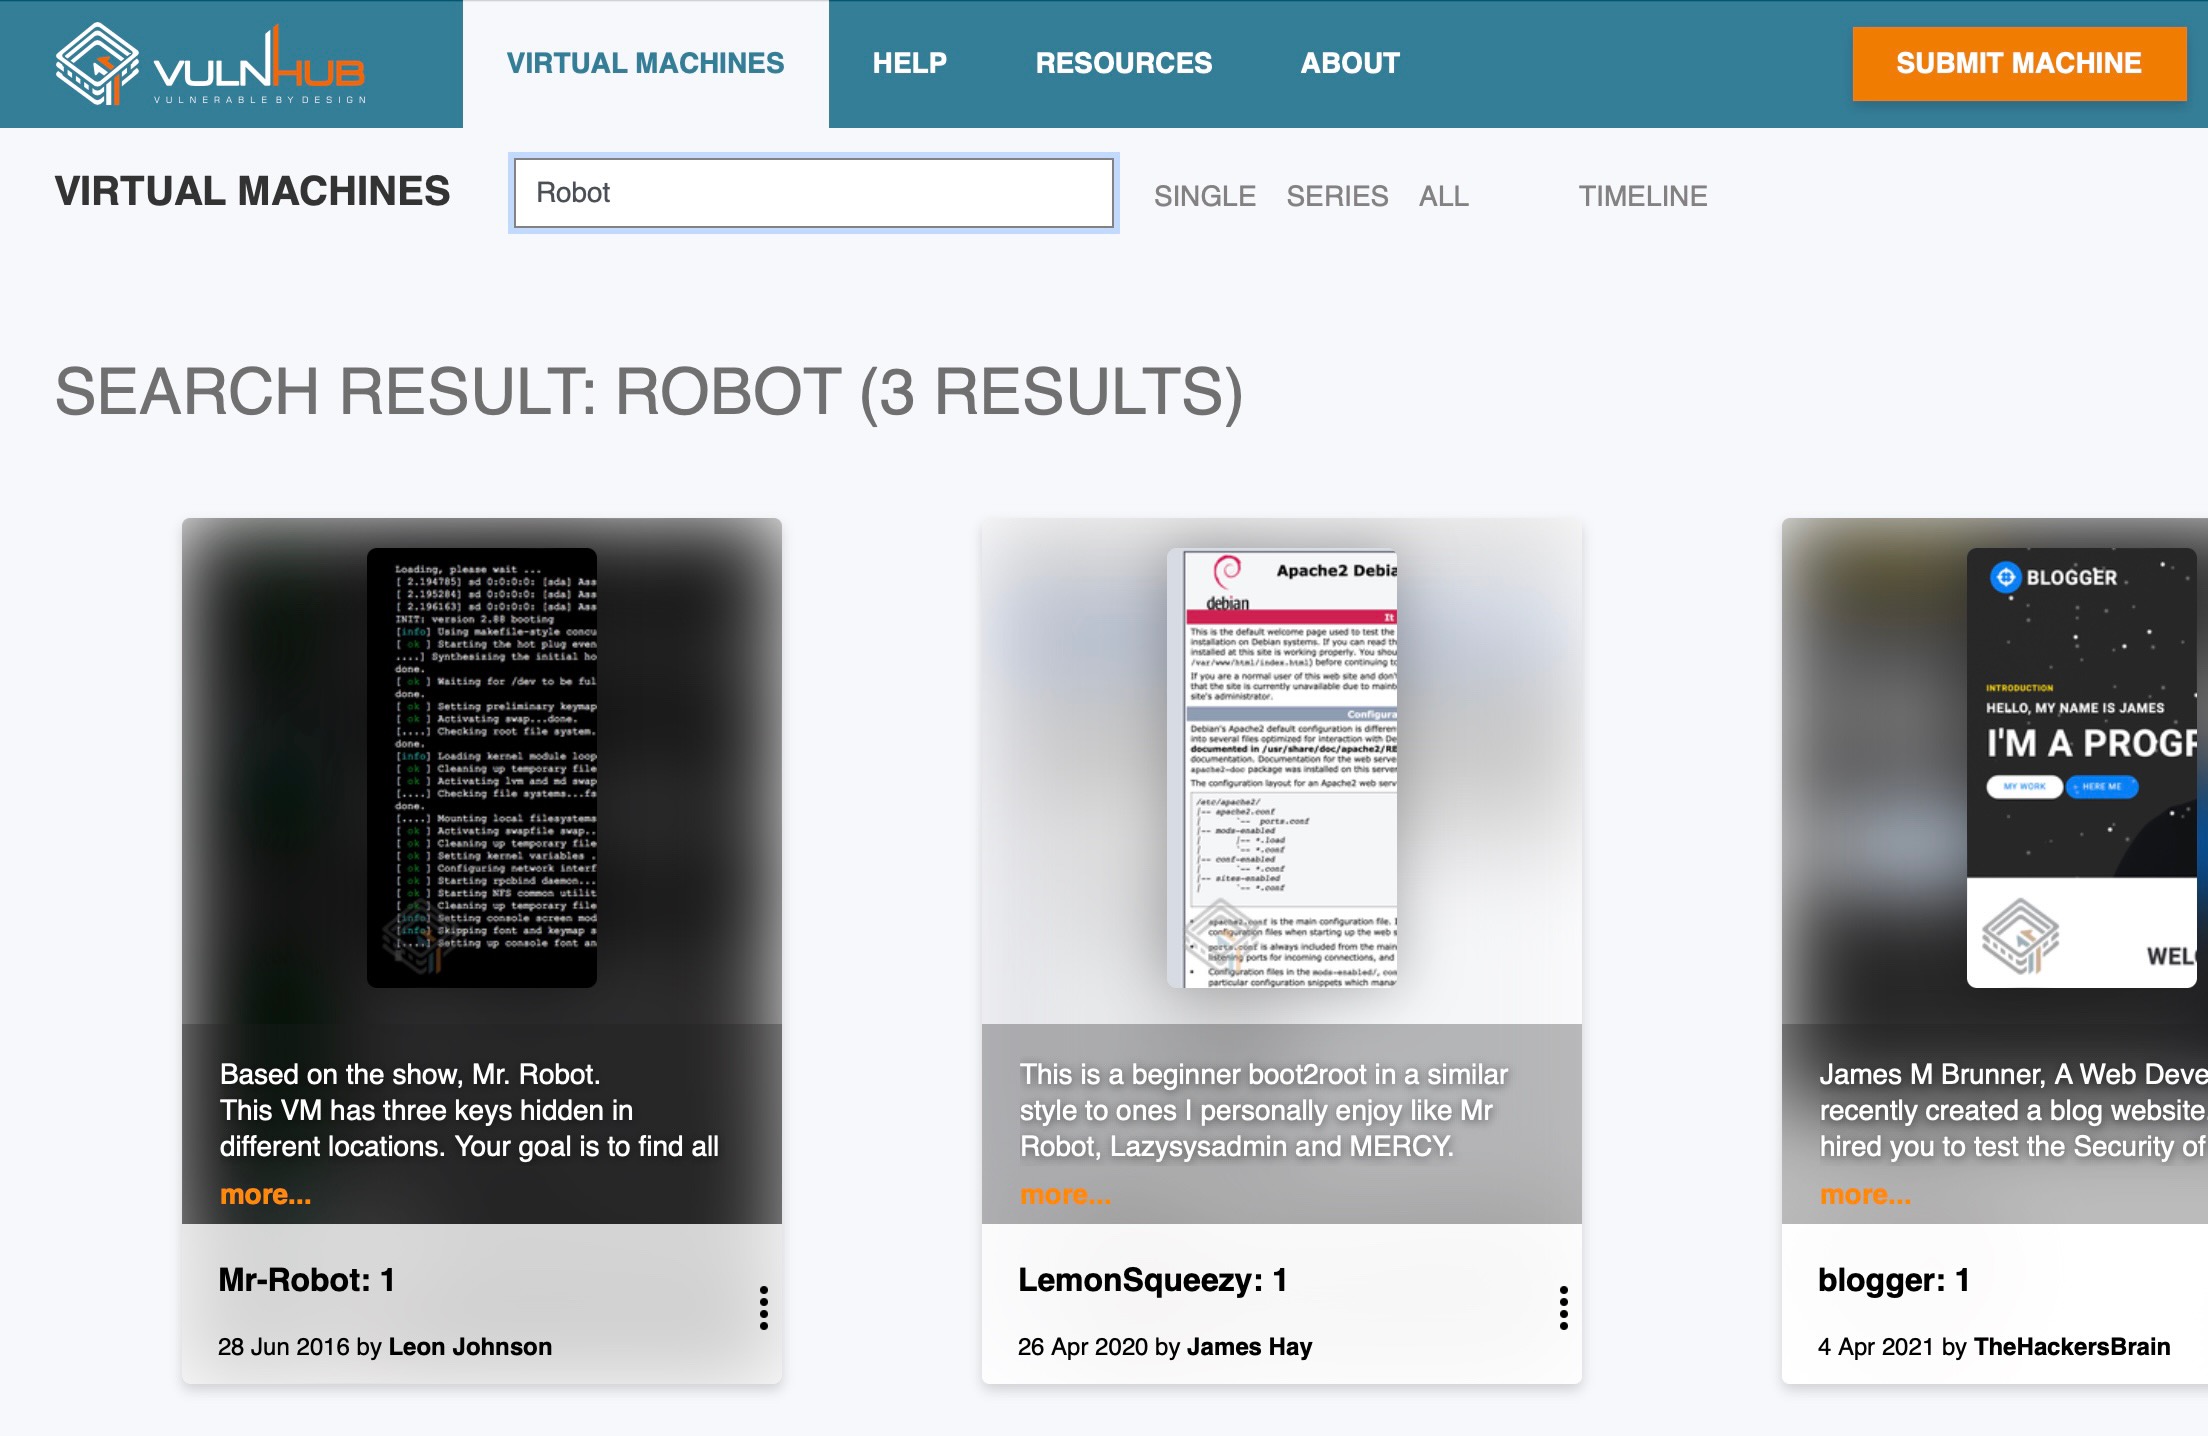
On vulnerable hub we search for Robot and find 3 search results. We look for Mr-Robot: 1, click on it and find the download link to download the .ova file for the vulnerable virtual machine.
To install Mr-Robot: 1 as virtual machine in UTM we first must unpack the .ova file.
patrick % ls
total 2884016
mrRobot.ova

patrick % tar -xvf mrRobot.ova
x mrRobot.ovf
x mrRobot.mf
x mrRobot-disk1.vmdk

patrick % ls
total 2884016
mrRobot-disk1.vmdk mrRobot.mf mrRobot.ova mrRobot.ovf
Then we convert the disk image file mrRobot-disk1.vmdk into the .qcow2 format which is the supported format by UTM. If you need some more detailed information there is a very good explanation on Xmodulo.
To convert the disk image from into .qcow2 we need the utility qemu-img. I install the complete qemu emulator from homebrew as the qemu utilities are not available as single option. If you don’t know homebrew or in case homebrew is not installed on your Mac just go to my blog site digitaldocblog and read the article how to intstall and use homebrew on your Mac.
patrick %  brew install qemu

patrick % ls
total 2884016
mrRobot-disk1.vmdk mrRobot.mf mrRobot.ova mrRobot.ovf

patrick % qemu-img convert -O \
qcow2 mrRobot-disk1.vmdk mrRobot.qcow2

patrick % ls
total 2884016
mrRobot-disk1.vmdk mrRobot.mf mrRobot.ova mrRobot.ovf
mrRobot.qcow2
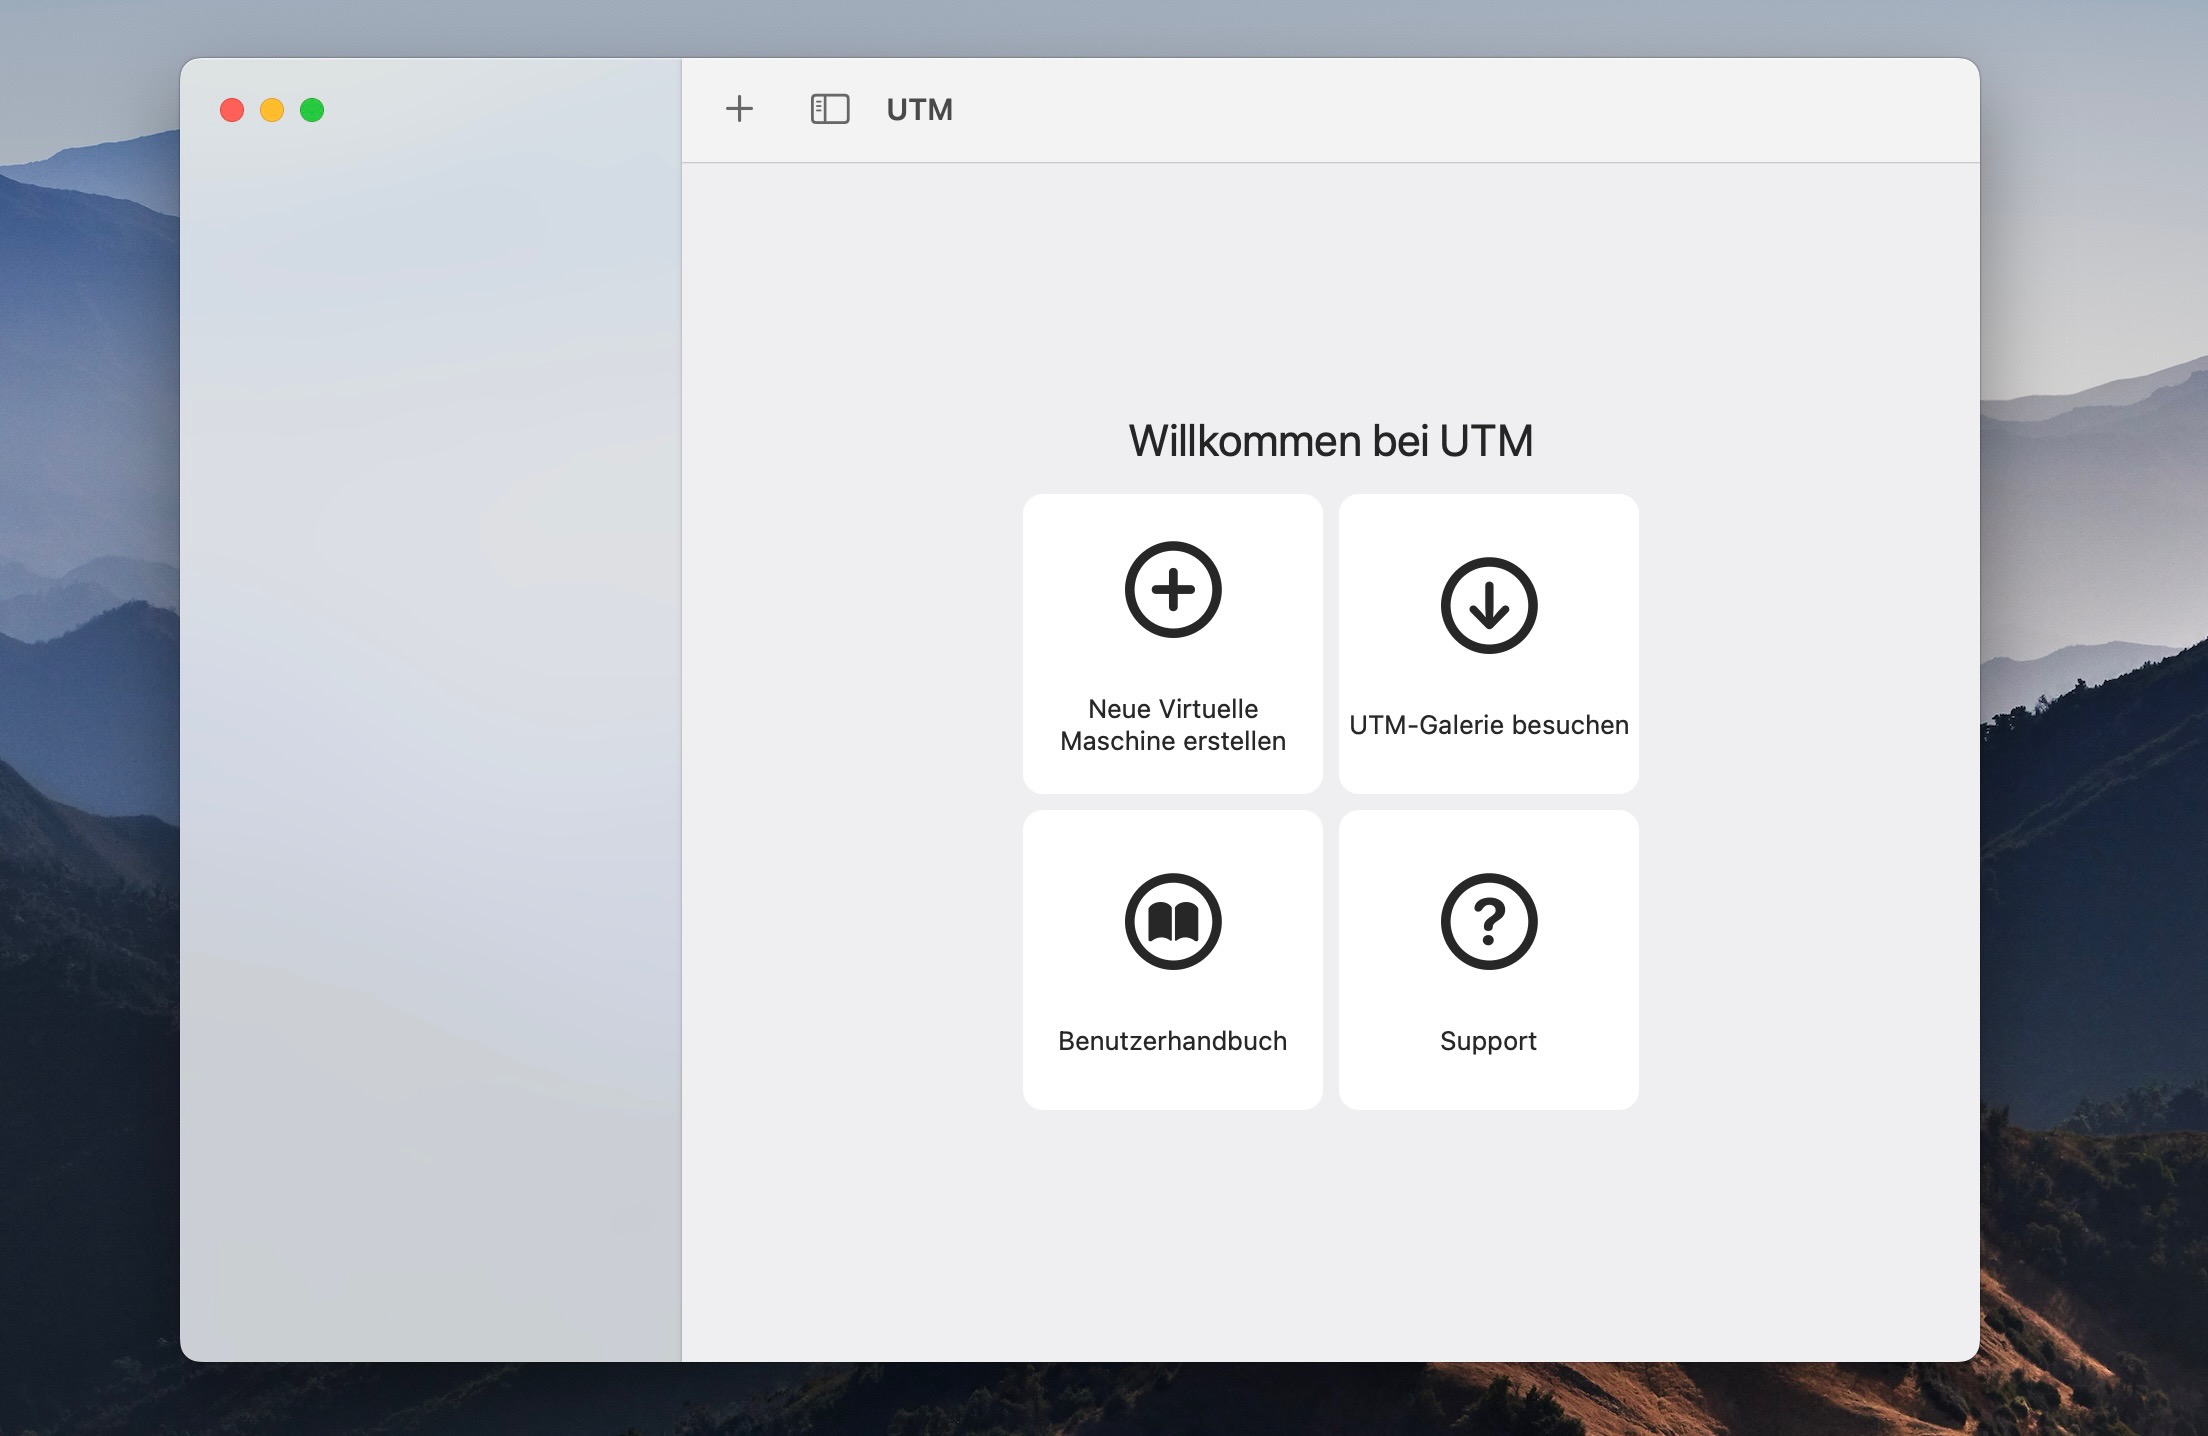
Then you start UTM from the main menue and click create new virtual machine.
Then you click on Emulate. You click on Emulate because the virtual machine you are going to install is compiled for the x86 64 Intel CPU Architechture. This Intel CPU must be emulated by UTM to provide the basis that your host can run as guest on your Apple ARM Silicon Mac (M1 and M2). In the next chapter when we install the attacker Linux we choose a virtual machine that is compiled for the Apple ARM 64 Silicon architechture. Then we click Virtualize because this guest machine is compiled for your host architecture (M1 or M2).
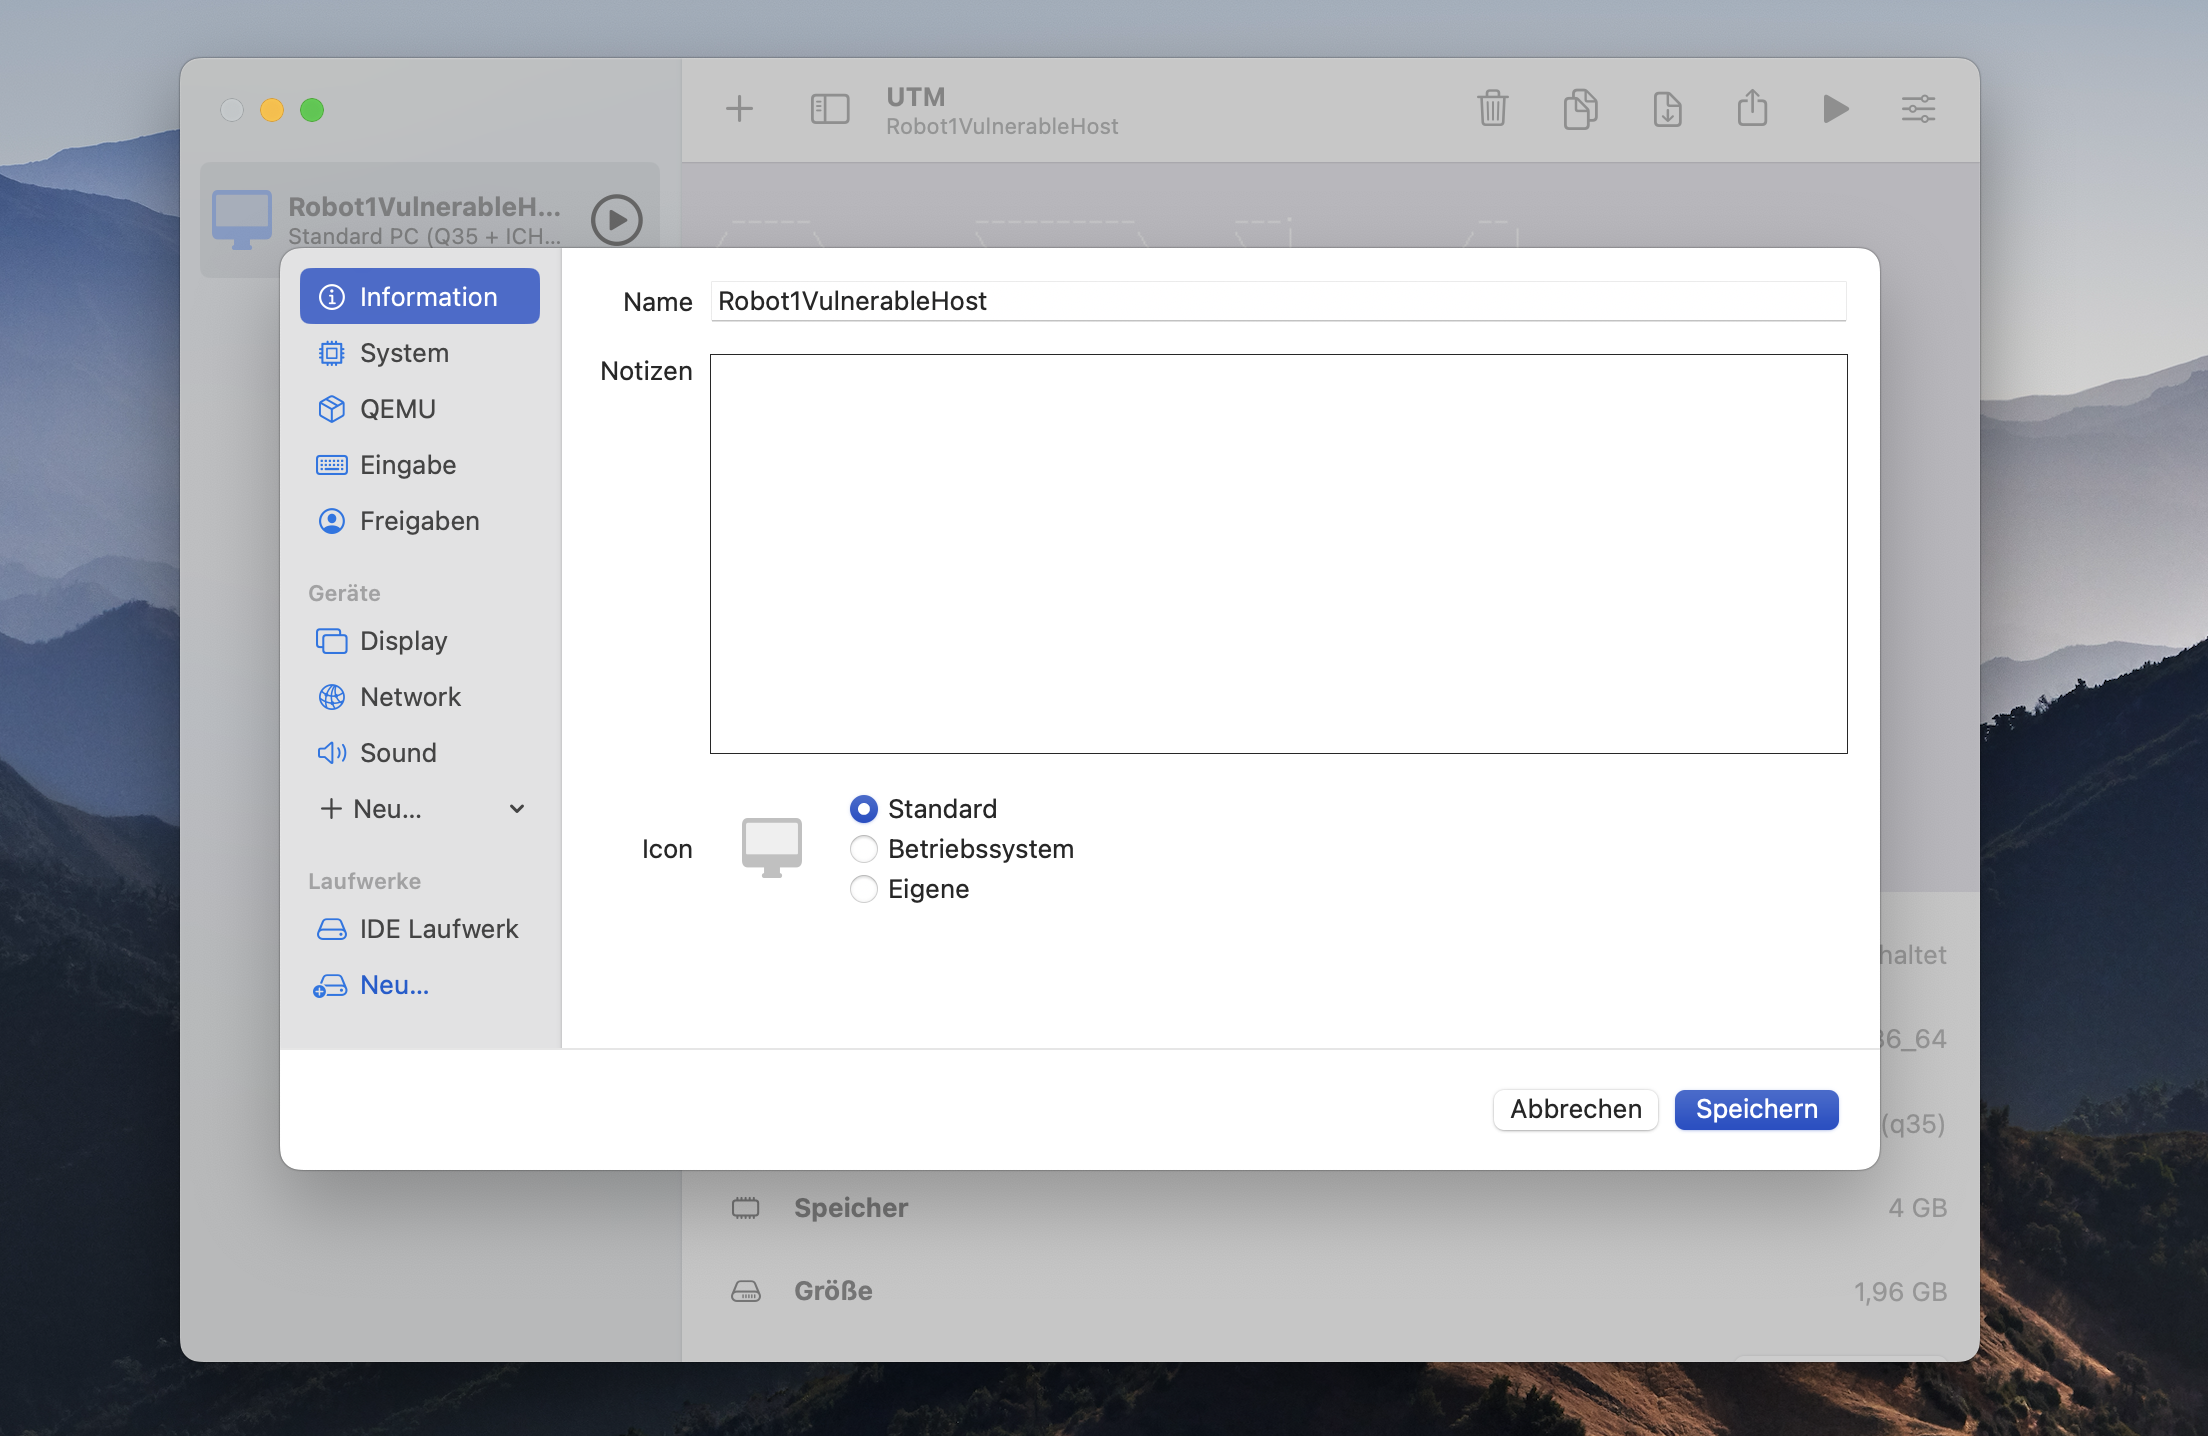
After Emulate you click on Custom. Then you skip ISO boot, accept in the following all default values and assign a name fitting your needs for your new virtual host. At the end, the configuration is completed with safe.
In the left panel you see the virtual machine you just created. Mark it and click on the settings menue at the top right side.
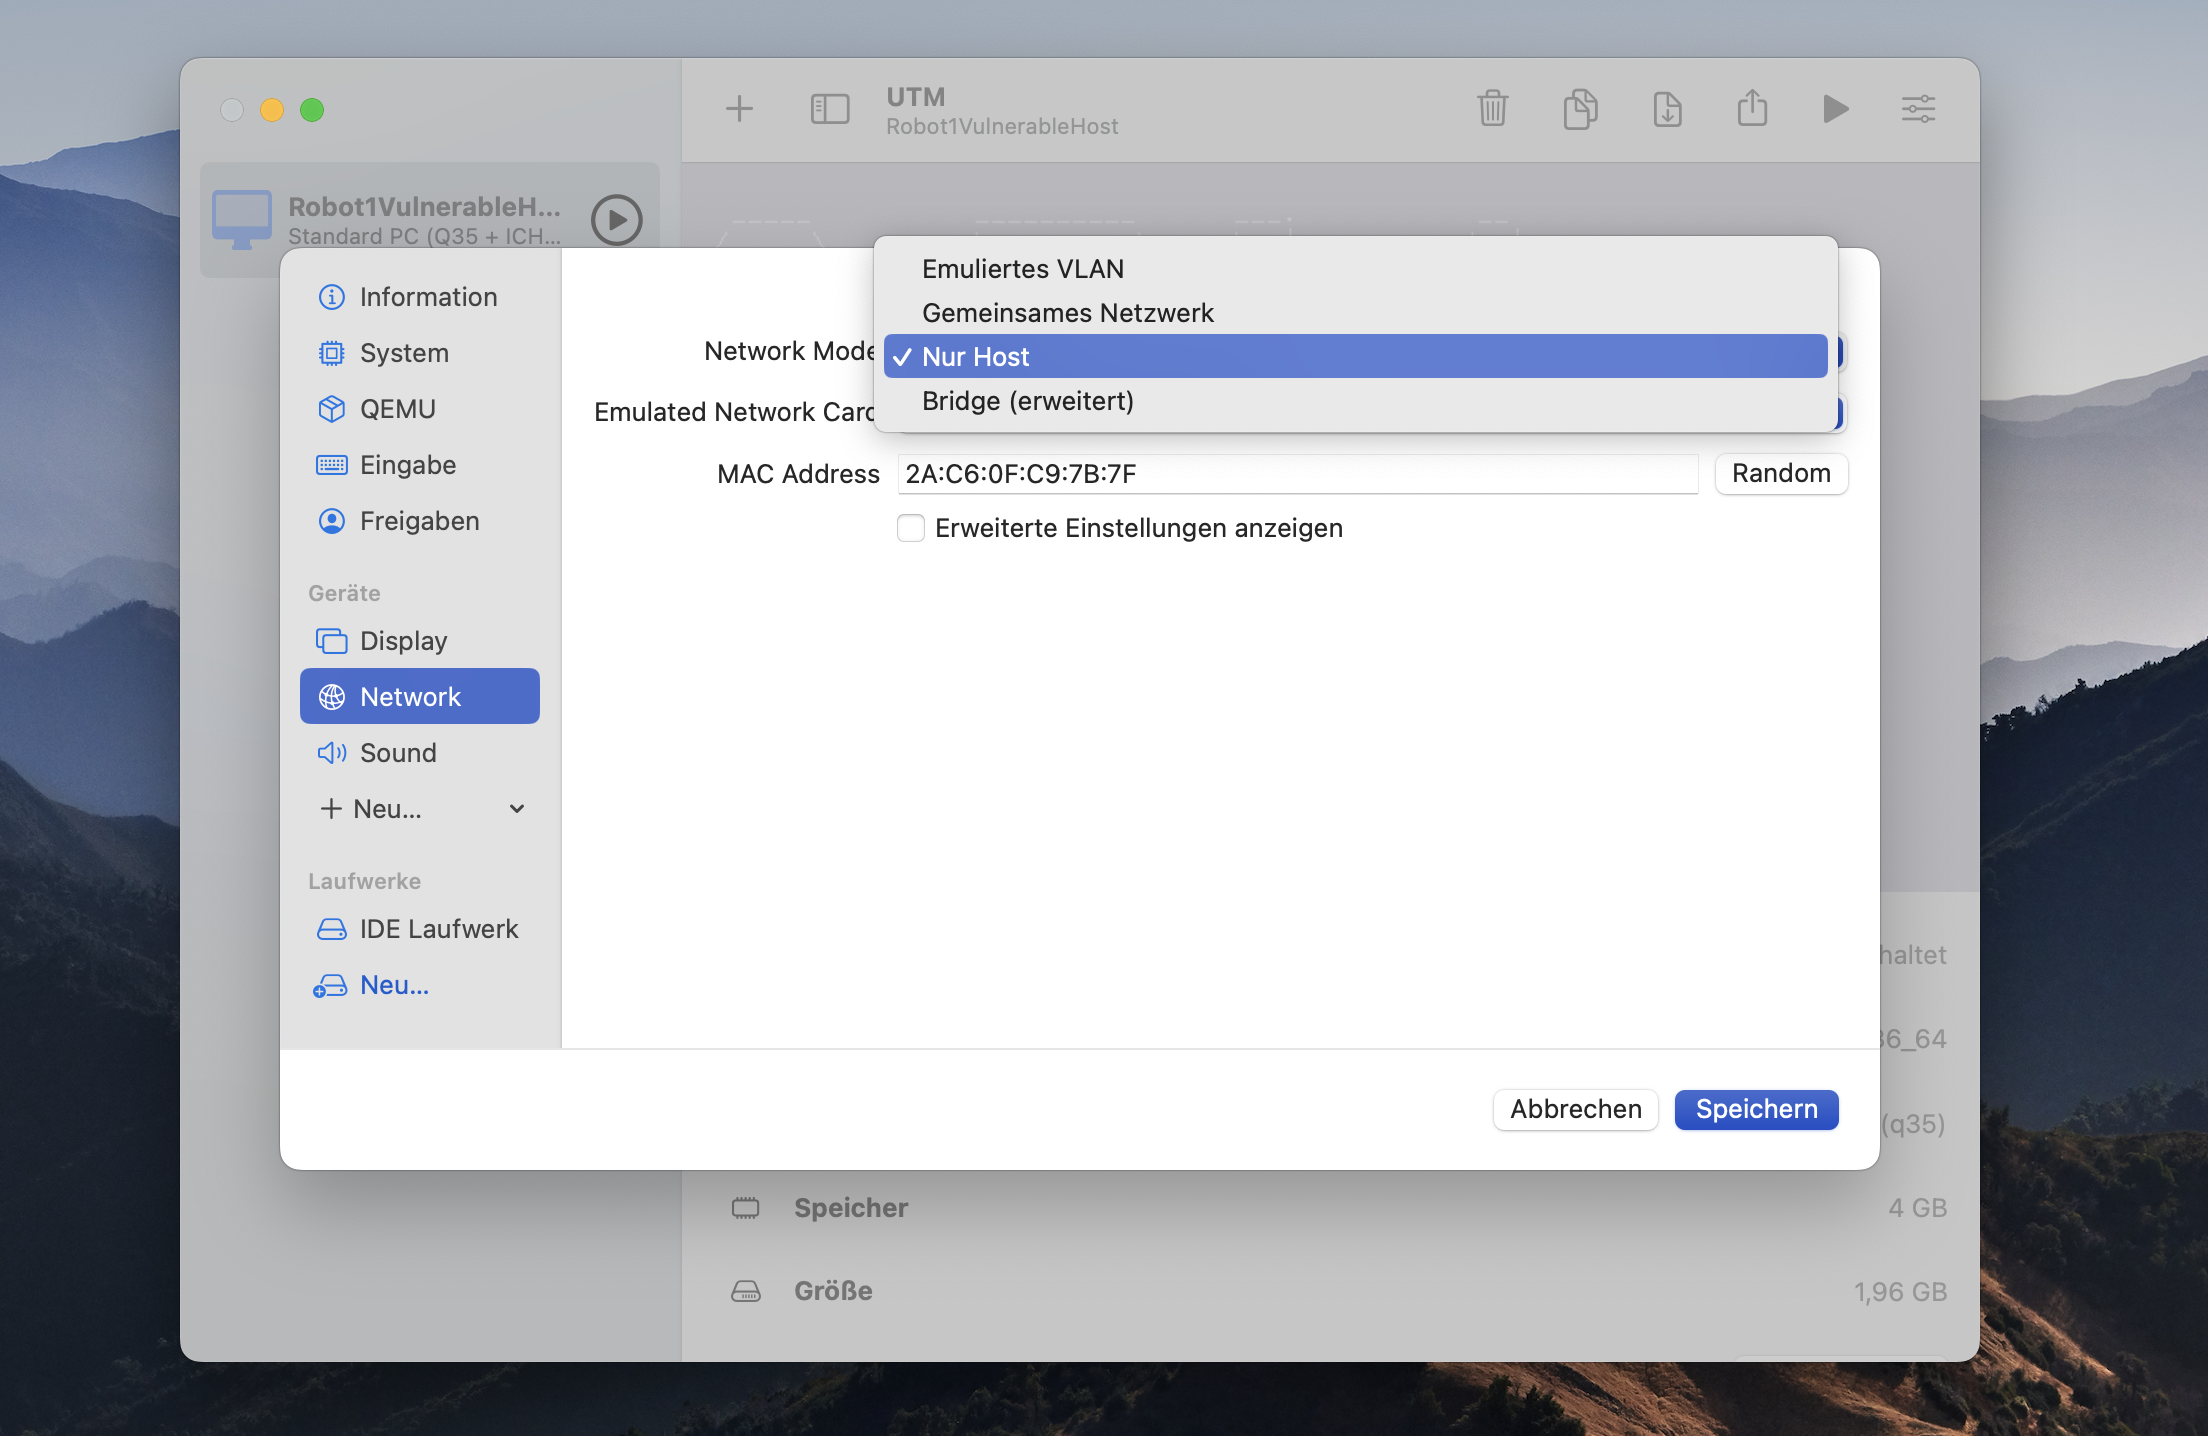
In the left panel of the settings go to the Drives section and delete the IDE drive. Stay in the Drives section and create a new drive. Here you click on Import and select the .qcow2 file on your hard disk (the one you created as you converted the .vmdk file). After this step go to the QEMU section where you unselect UEFI Boot. To set the correct network settings go to Network section and select Host only. Finally you click on safe and end the configuration.
Create the attacker virtual machine in UTM
To launch attacks against a vulnerable virtual host I recommend installing a standard Kali Linux machine in UTM. Most tools are already pre-installed here and you can start immediately.
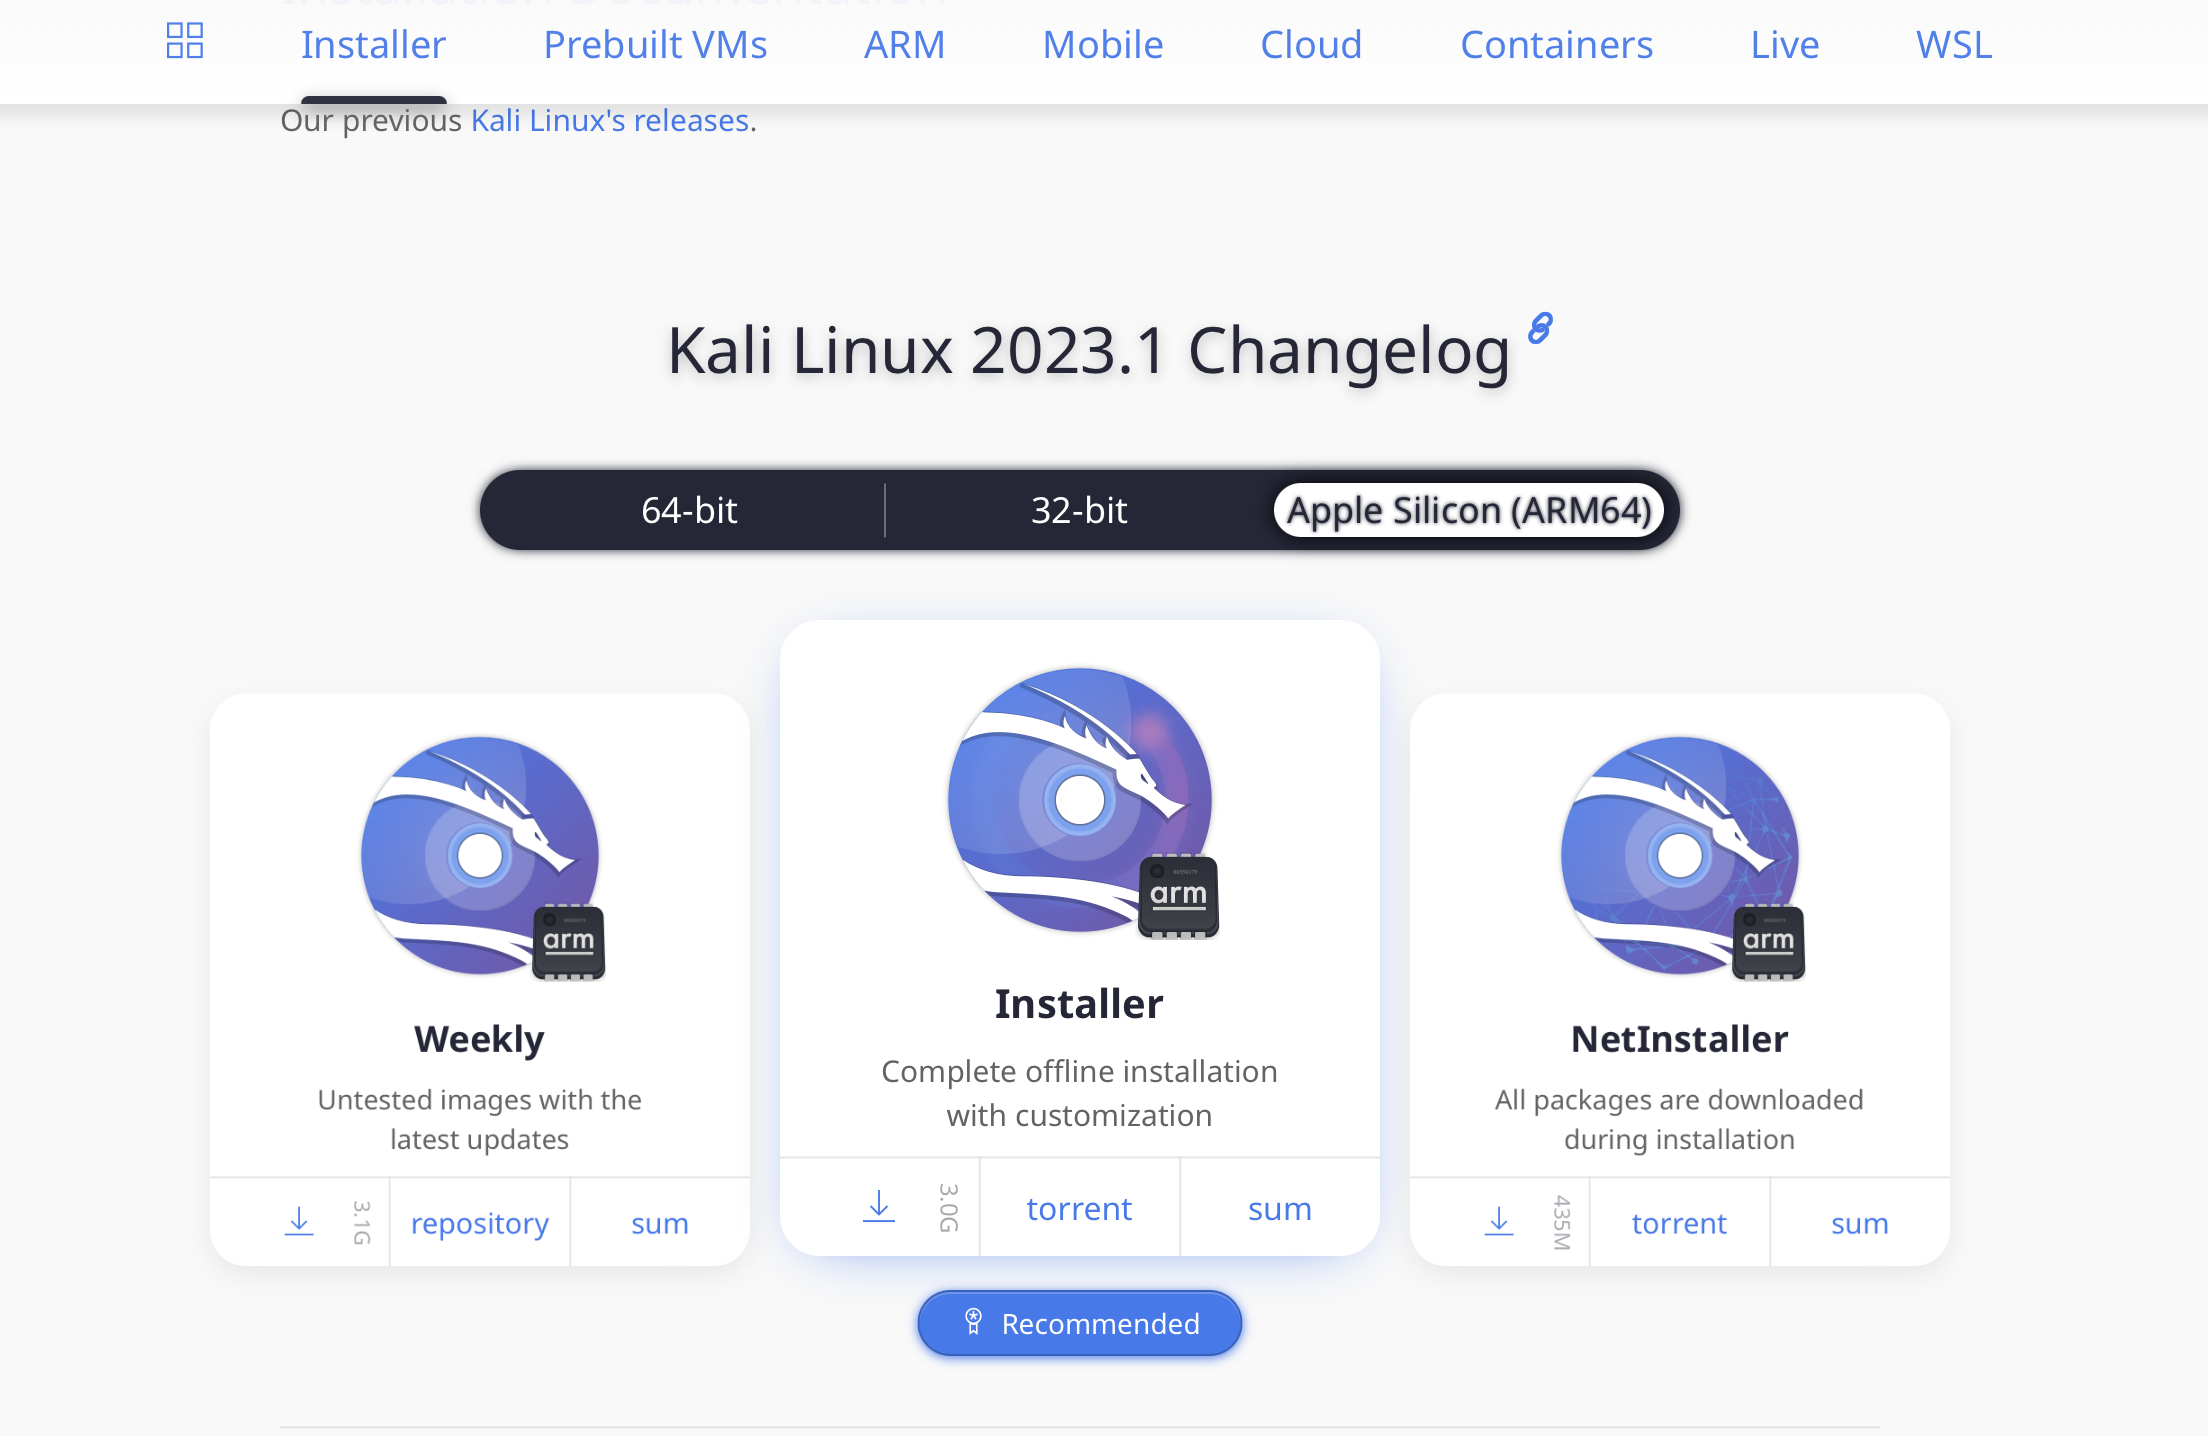
We go on the Kali.org website an there into the section get Kali. I choose installer images and then we select the ARM Silicon (ARM64) for download the Kali especially compiled for our Apple ARM Silicon M2 architecture (if you have a M1 this is also working fine). Click on the recommended installer and download the iso image to your hard drive.
After you have downloaded the iso image the installation will be performed in 2 steps. First you create a new virtual machine in virtualization mode and then in step 2 you install the Kali Linux on it.
Click on the + sign in the top menue and then select Virtualize.
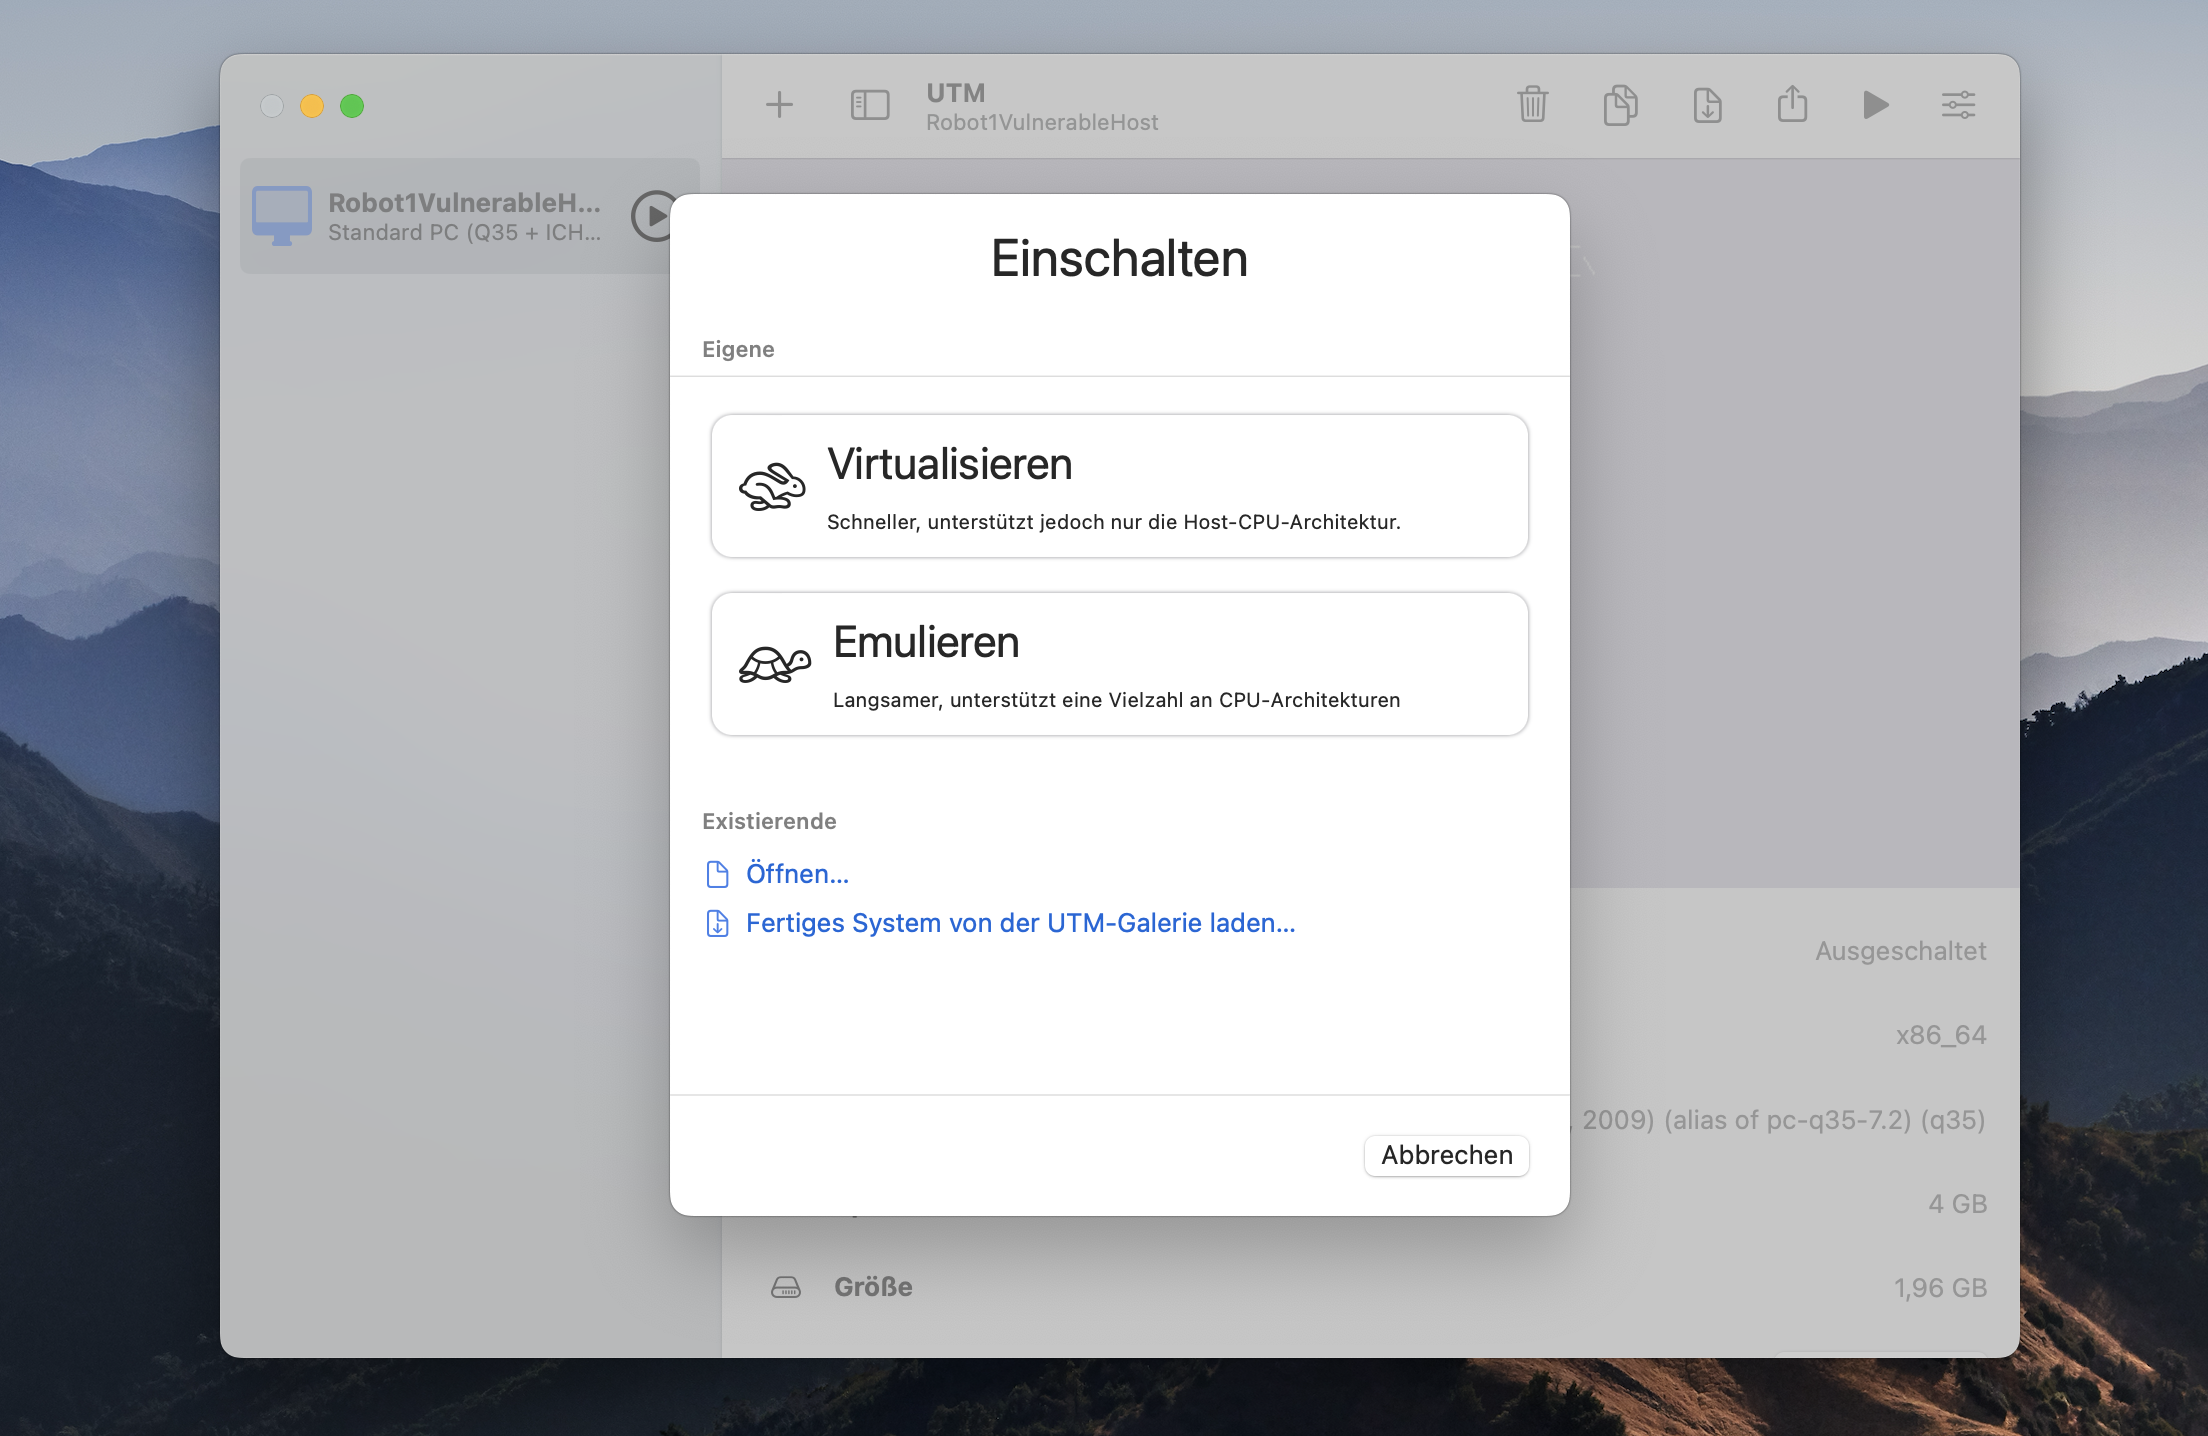
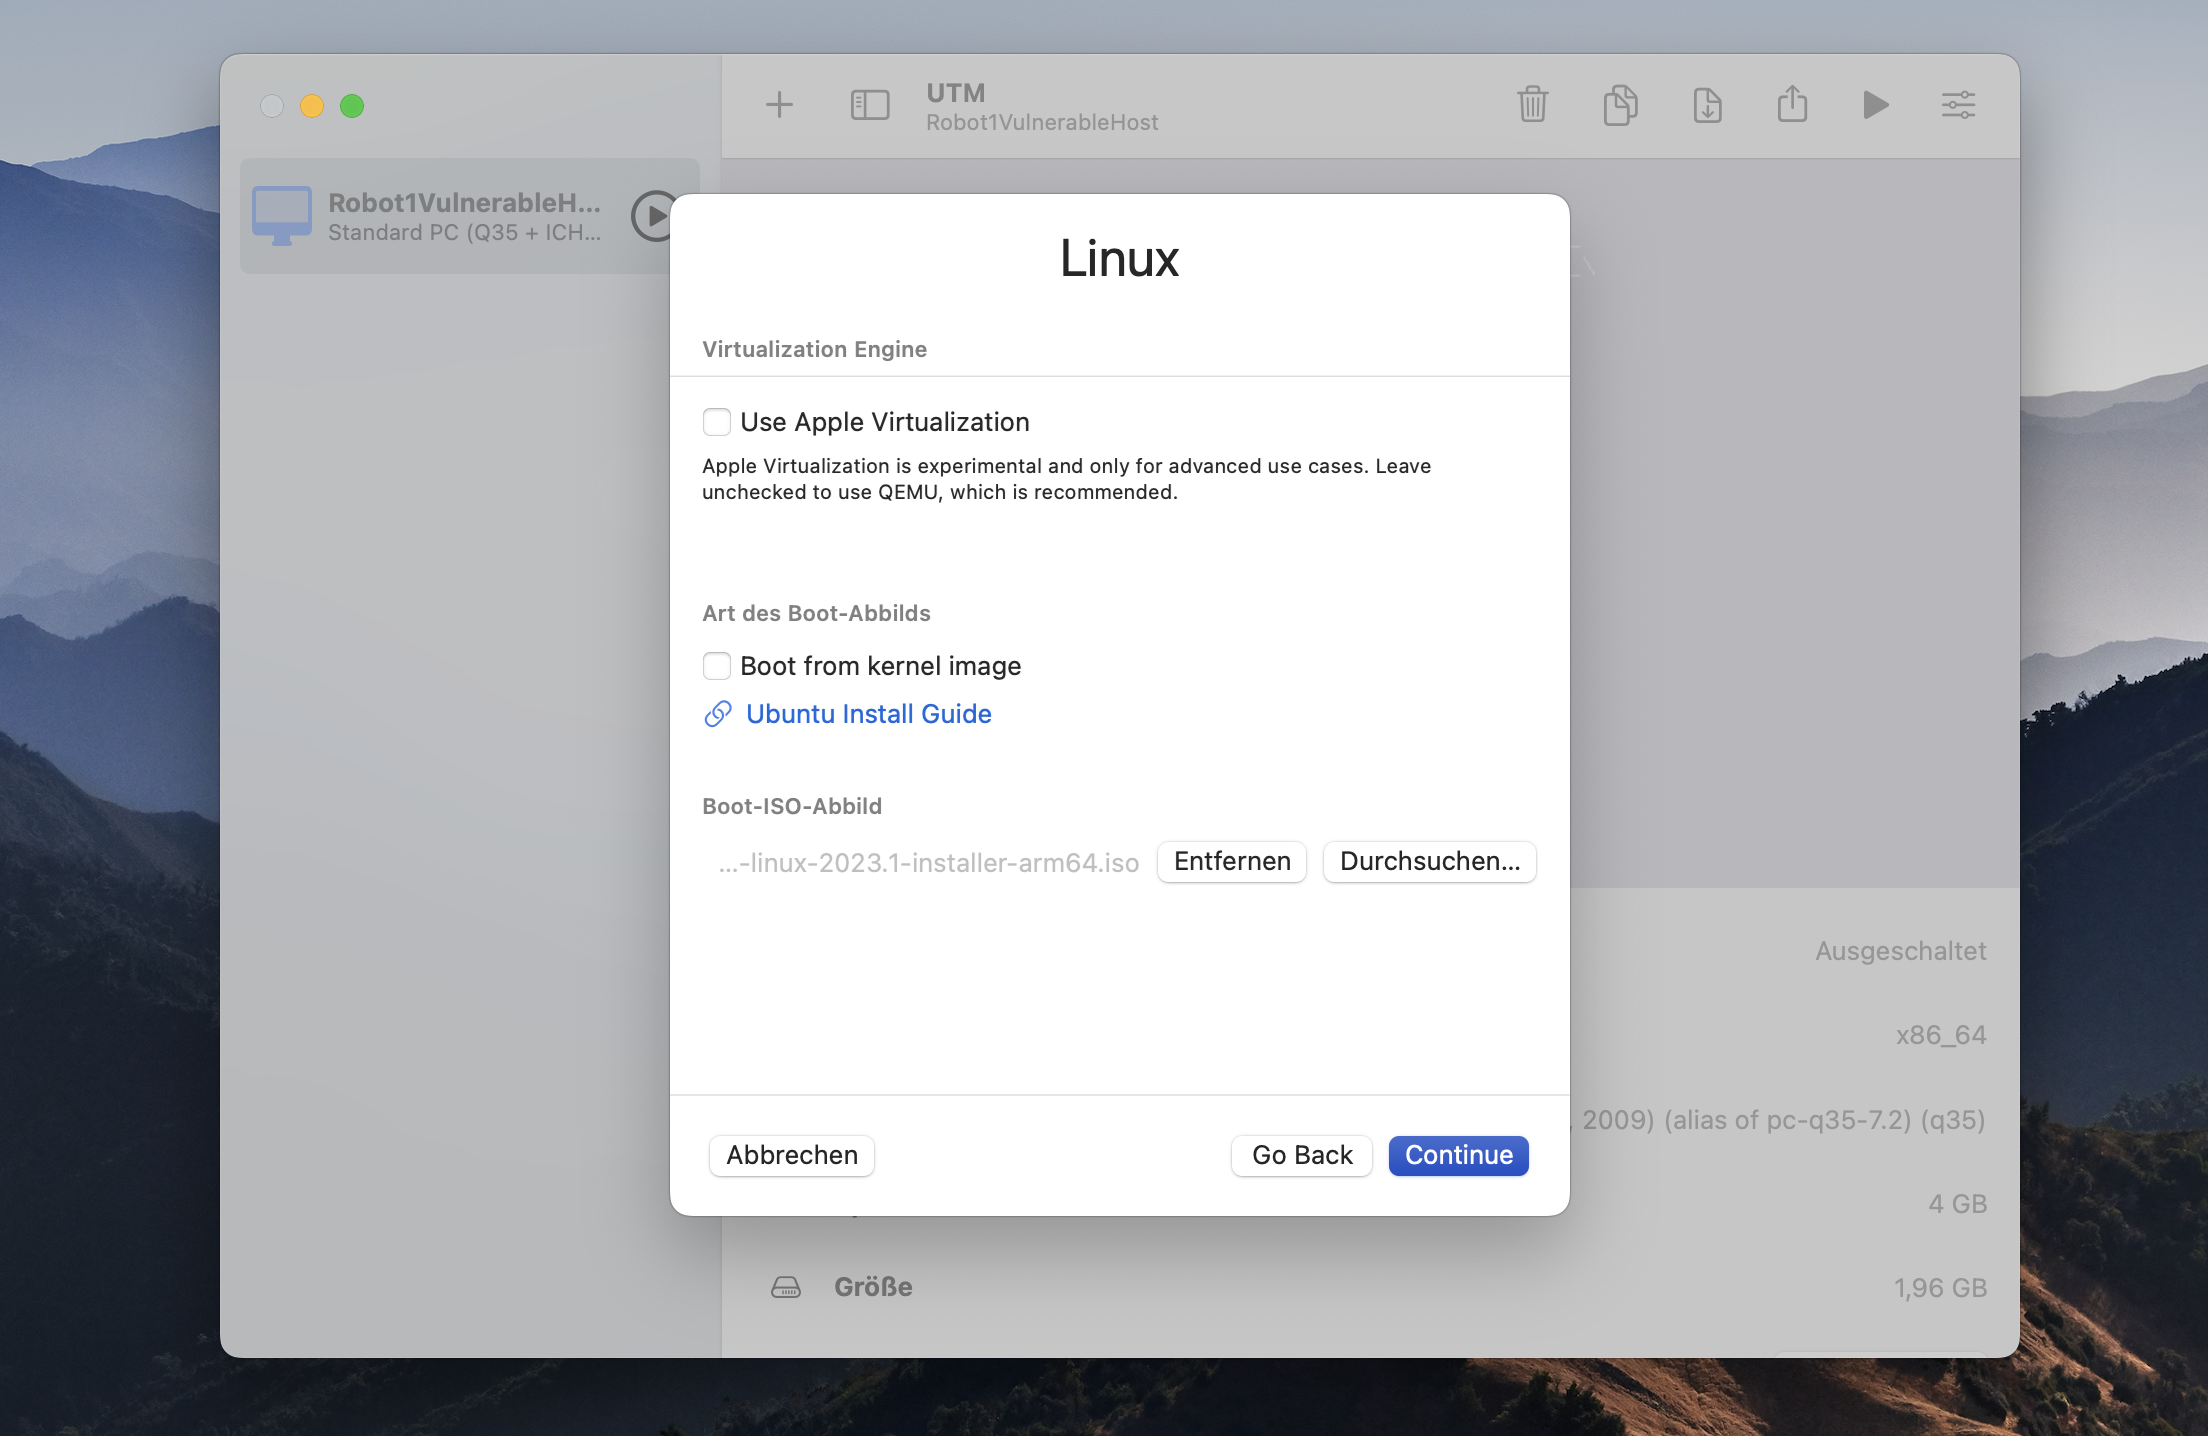
After that you can select the OS you want to install. Here you click on Linux and here you select the iso image you downloaded from Kali in the Boot-Iso-Image section.
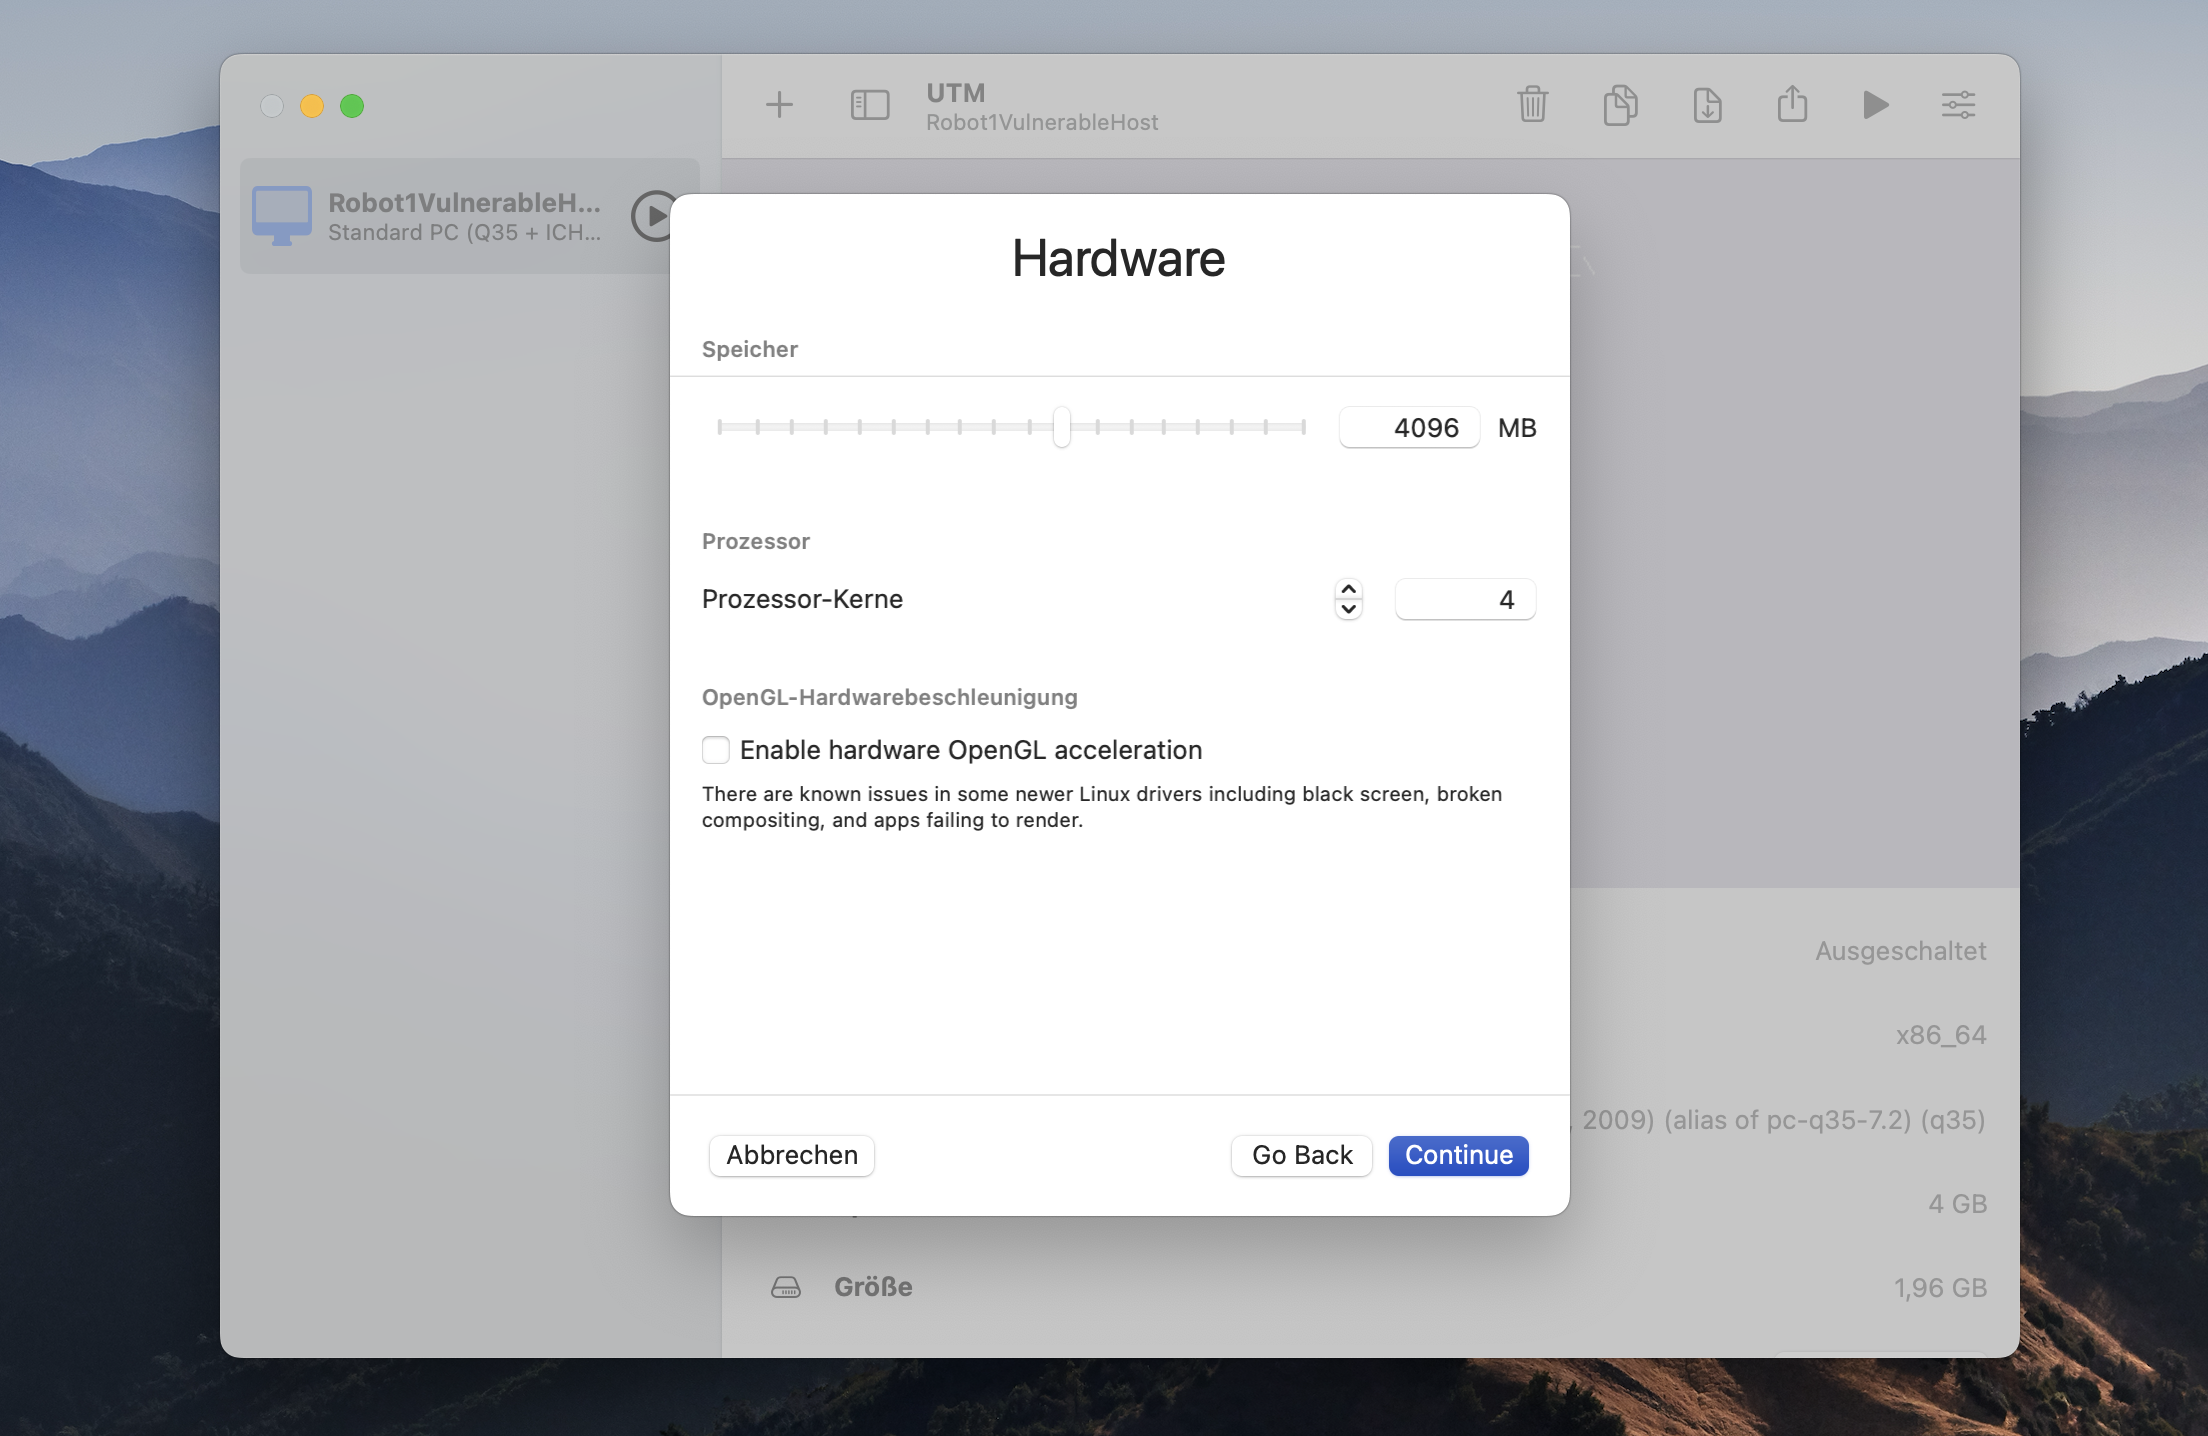
Then you click continue and keep the default value for the RAM but set the CPU cores to 4.
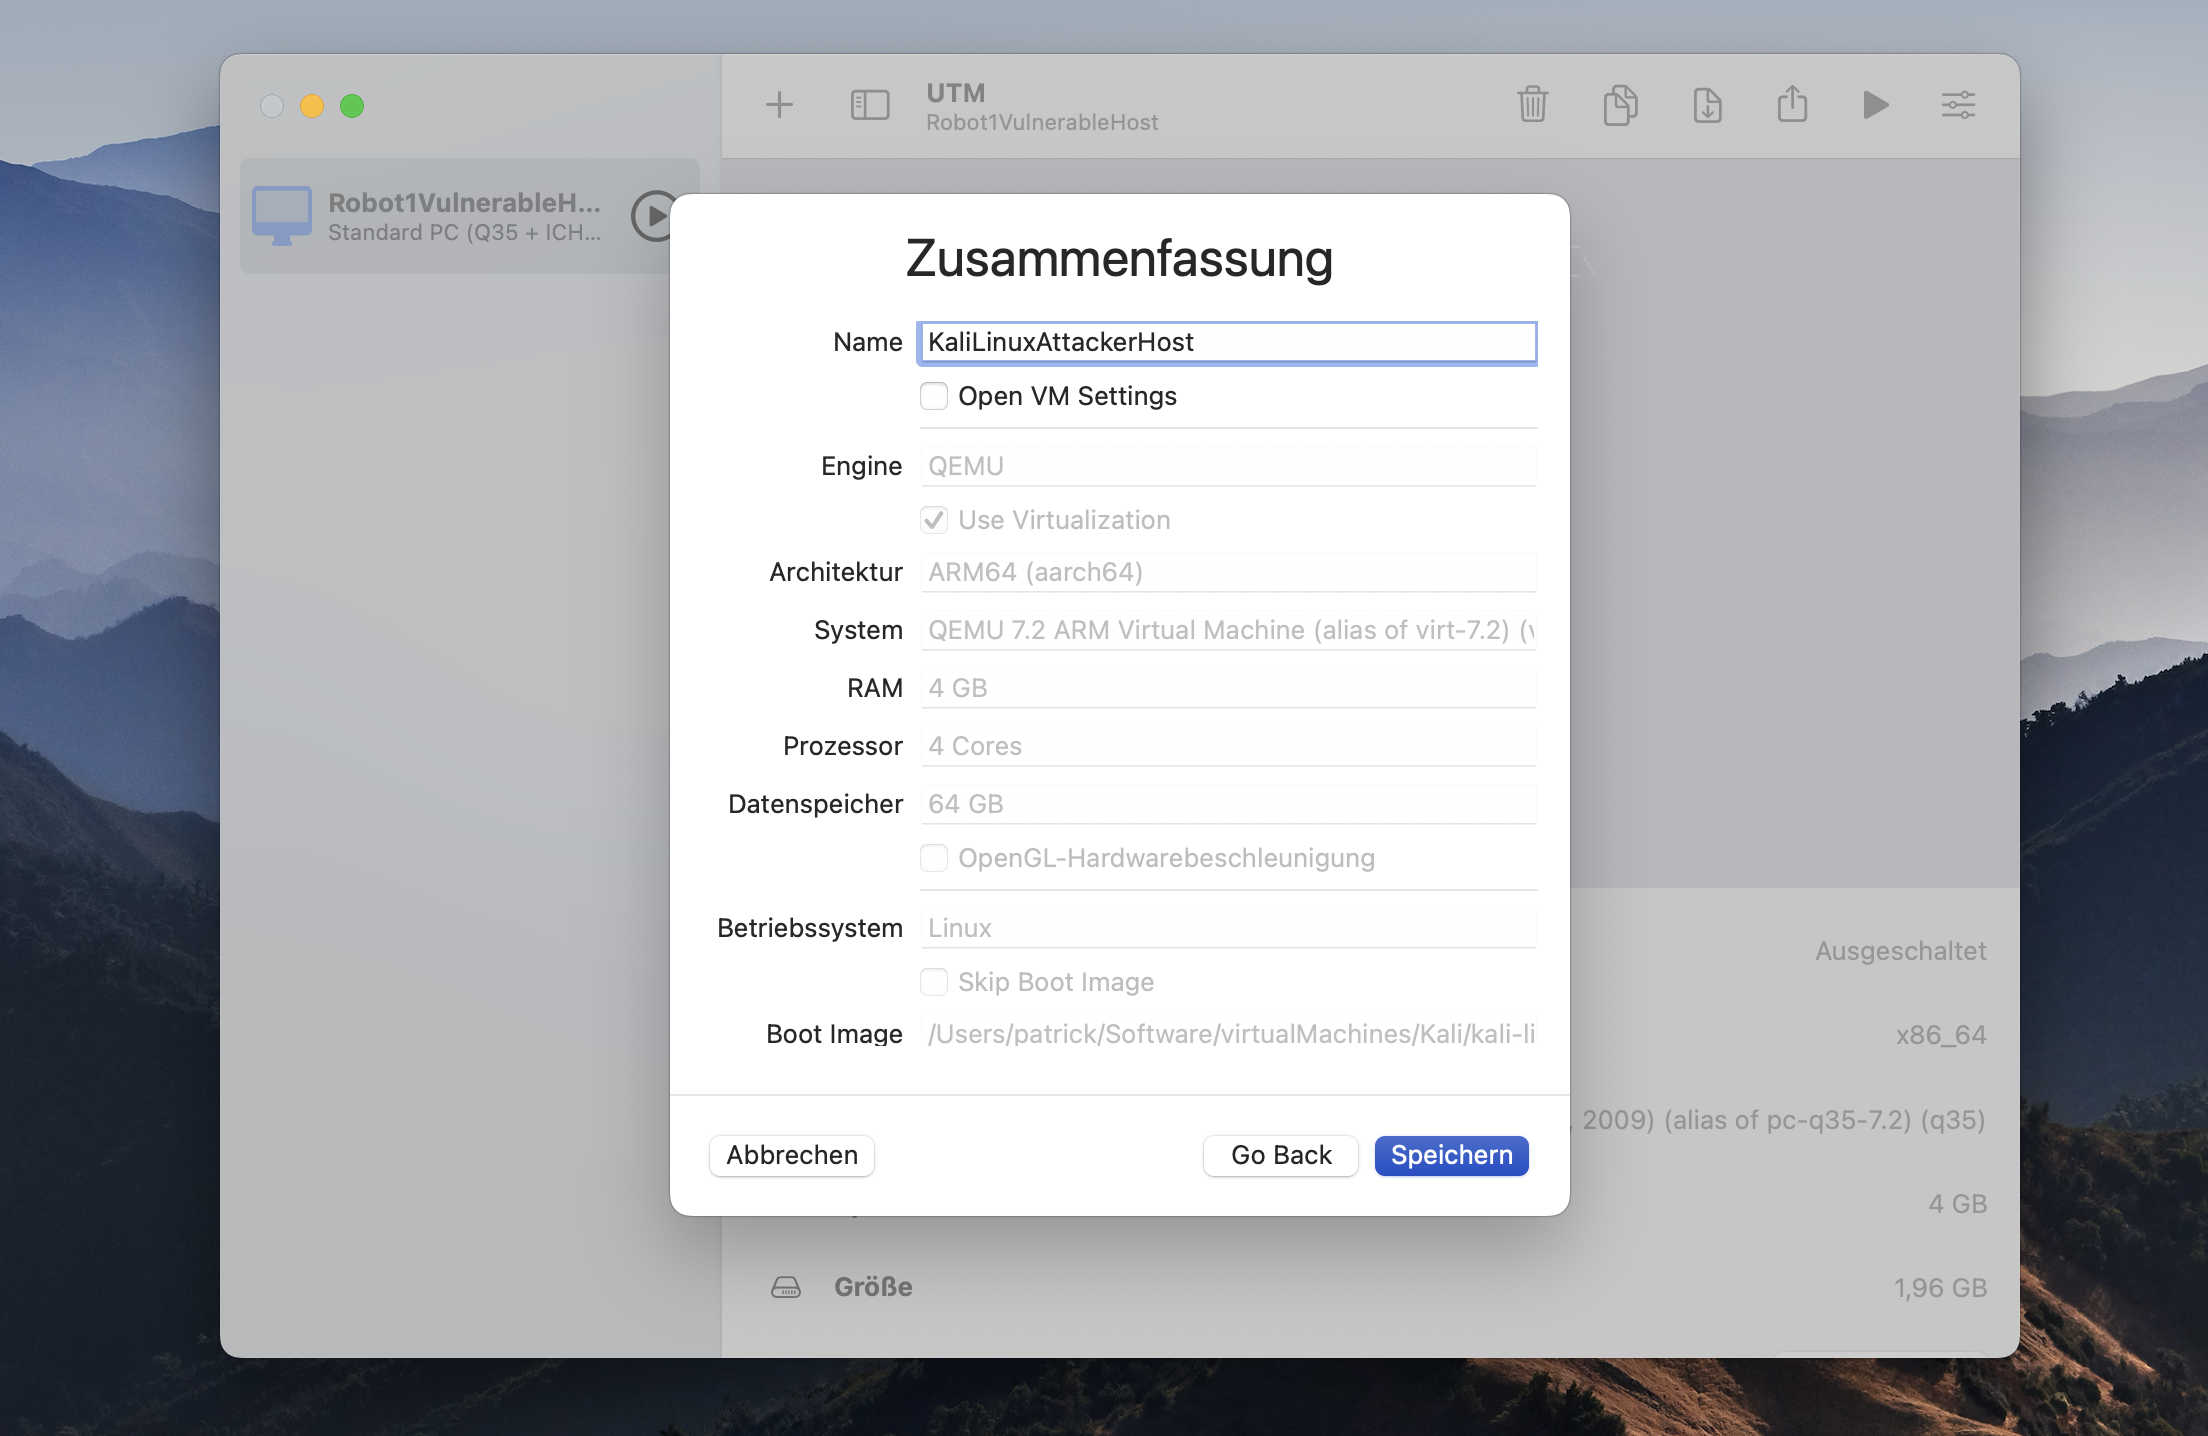
In the following you can keep all default values i.e. for storage and always click on continue until you come to the Summary section. Here you can give you new virtual machine a name according to your needs. Finally you click on safe.
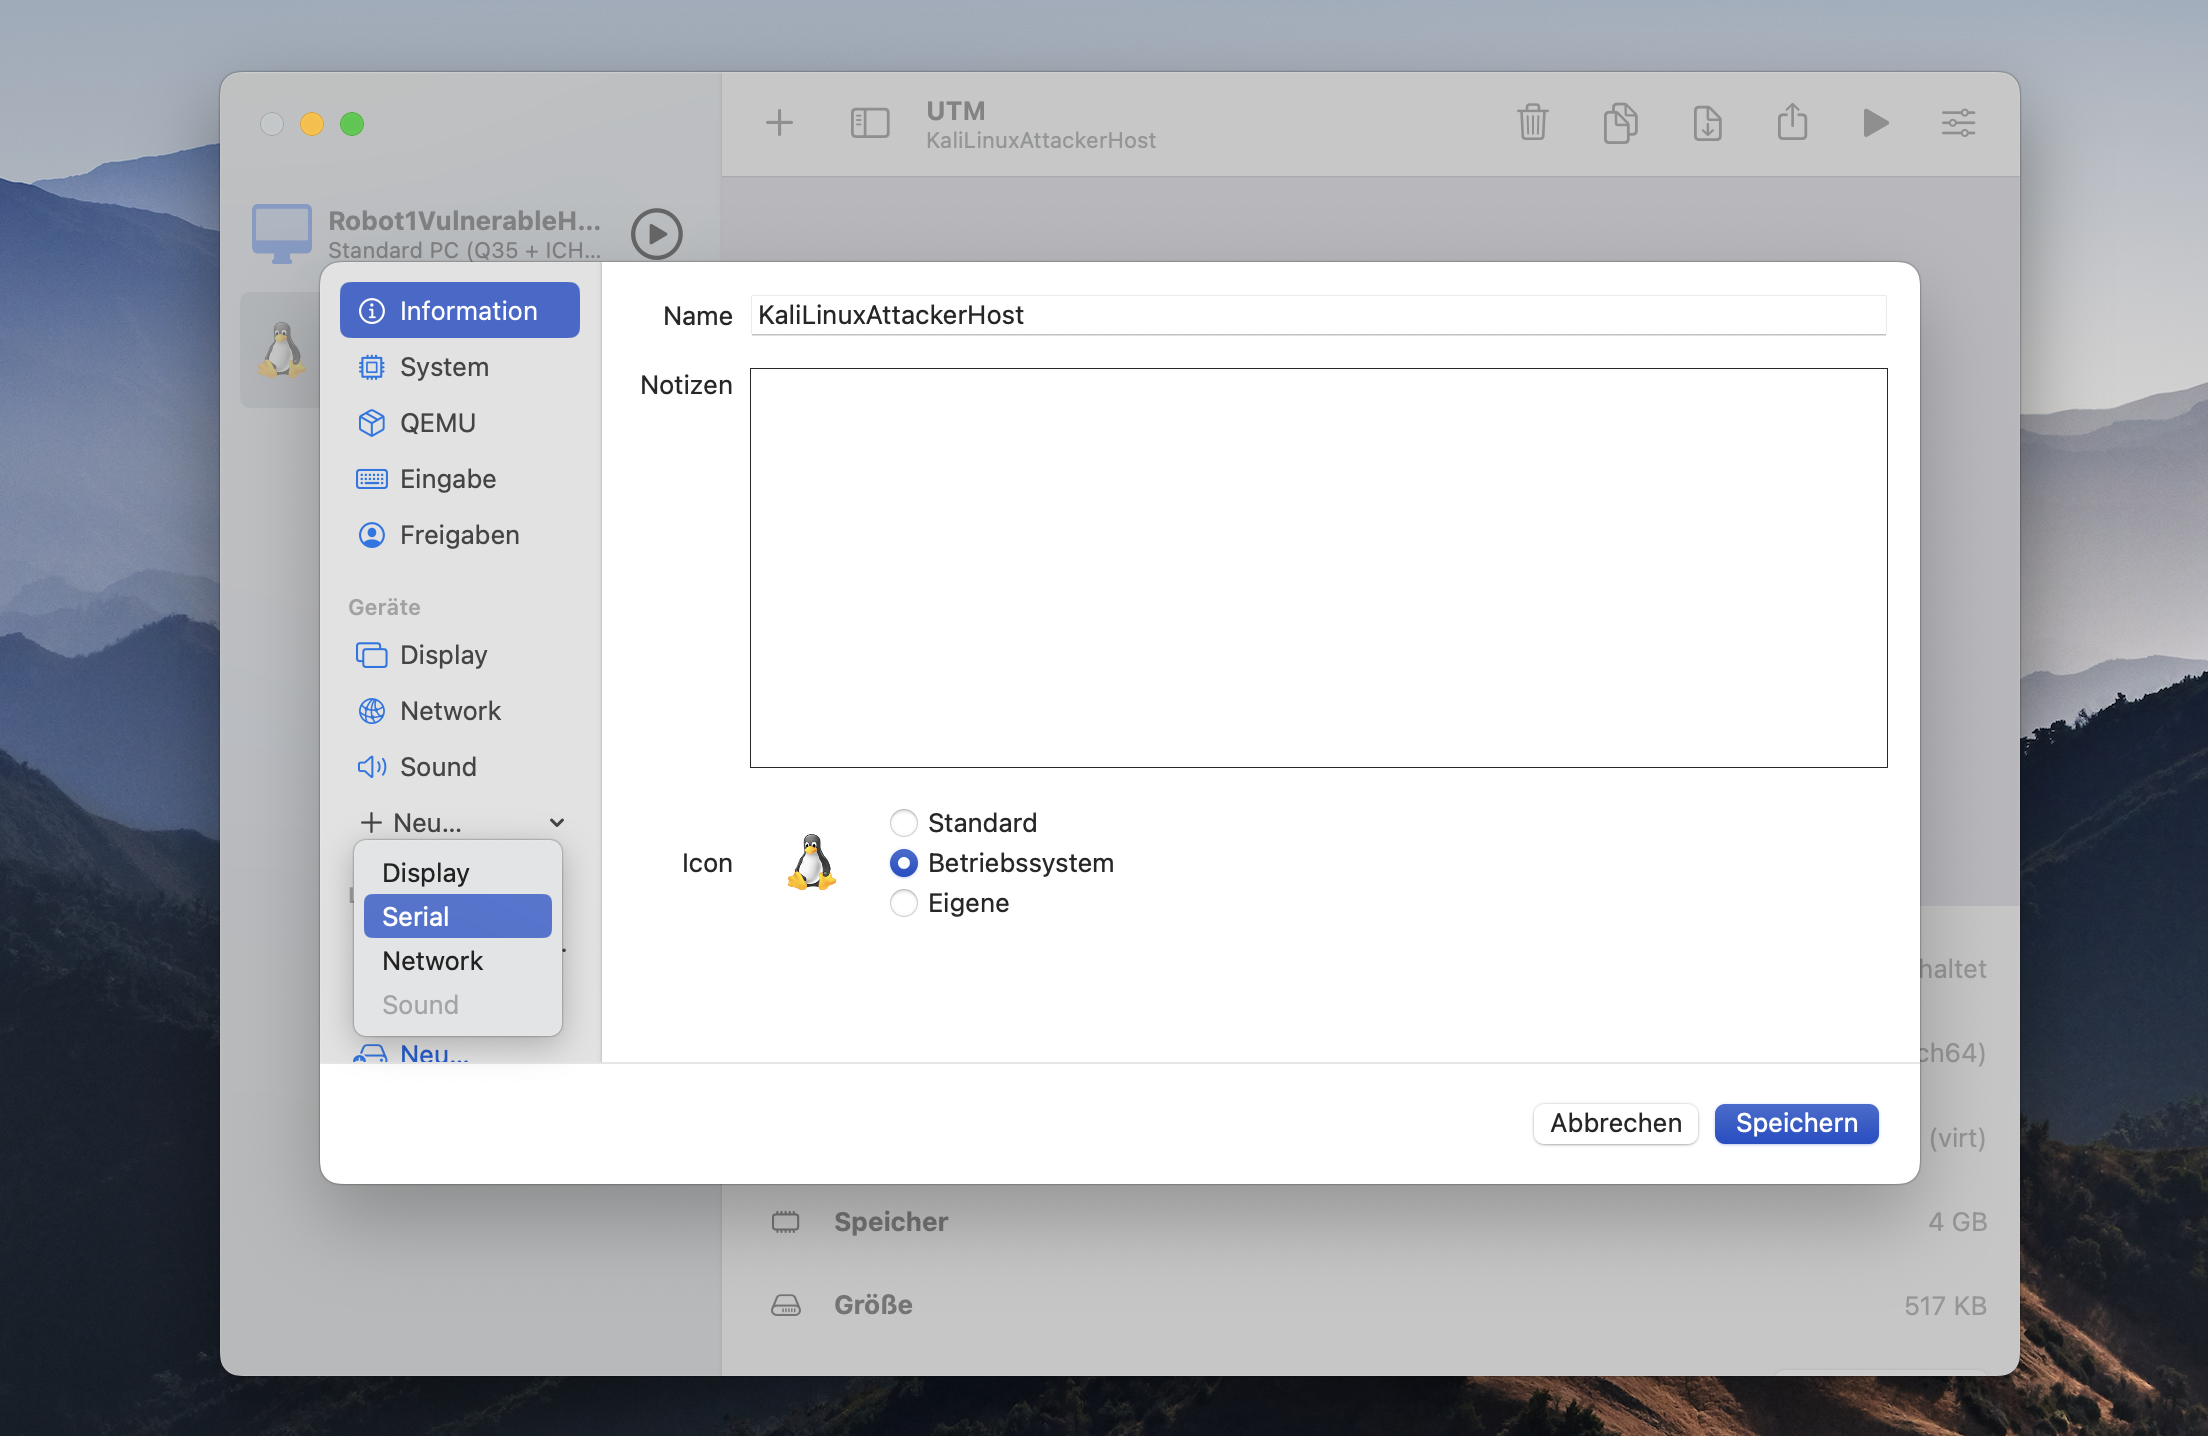
Then click on the settings to open the settings menue. Go to the Devices section and click on new and add a new serial device emulation. This is very important for the installation of Kali Linux on your virtual machine otherwise the installer will not start.
Run the virtual machine to start the installation. Here you see that 2 windows will be opened. Choose the window that says terminal one and start the installation. Don’t choose Graphical installation. Then follow the installation steps. You can see a very good video on YouTube that guide you through the standard installation.
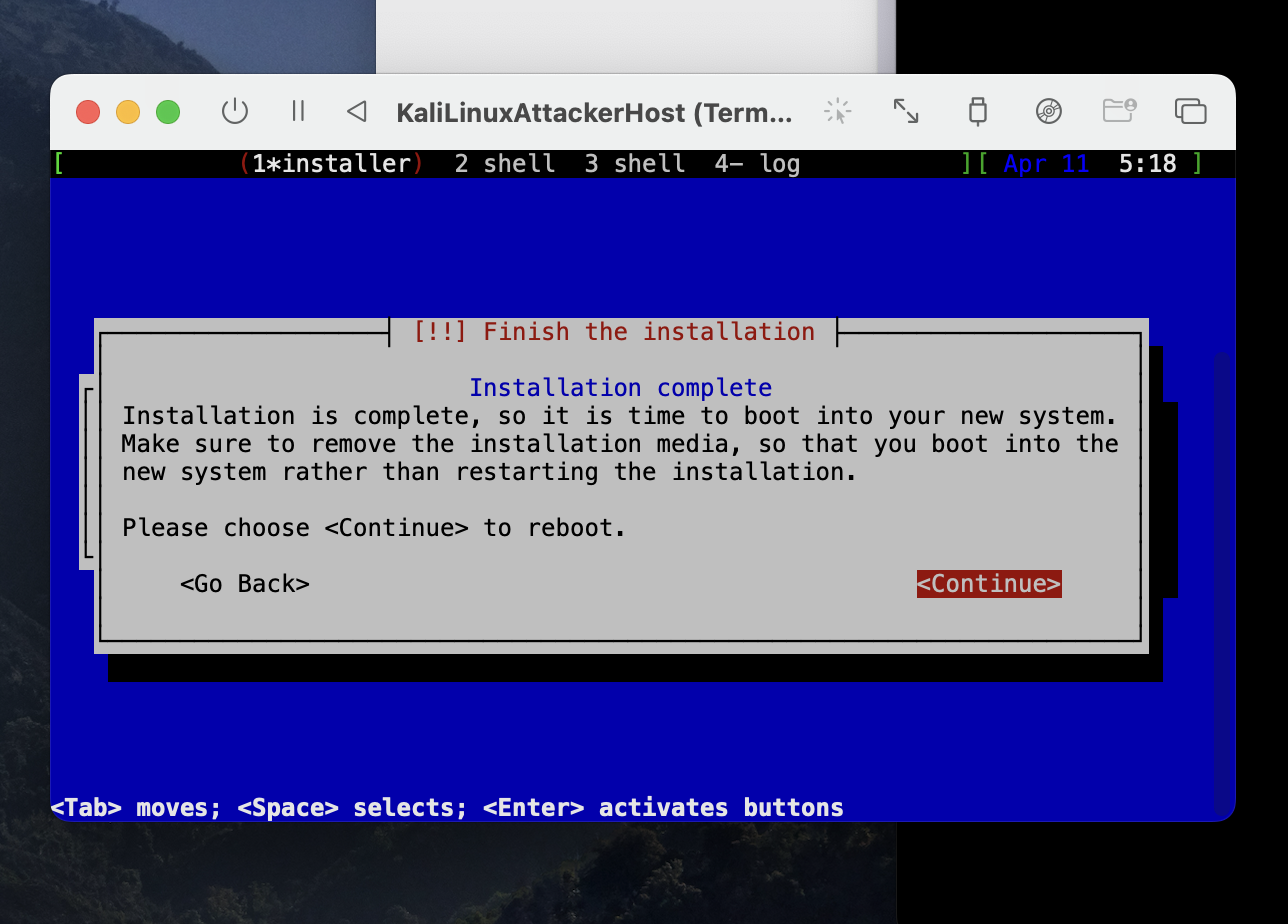
Once you see the finish installation screen then use the navigation bar of this window terminal 1 and shut down the virtual machine. Close the second window that has been opened when you started with the installation.
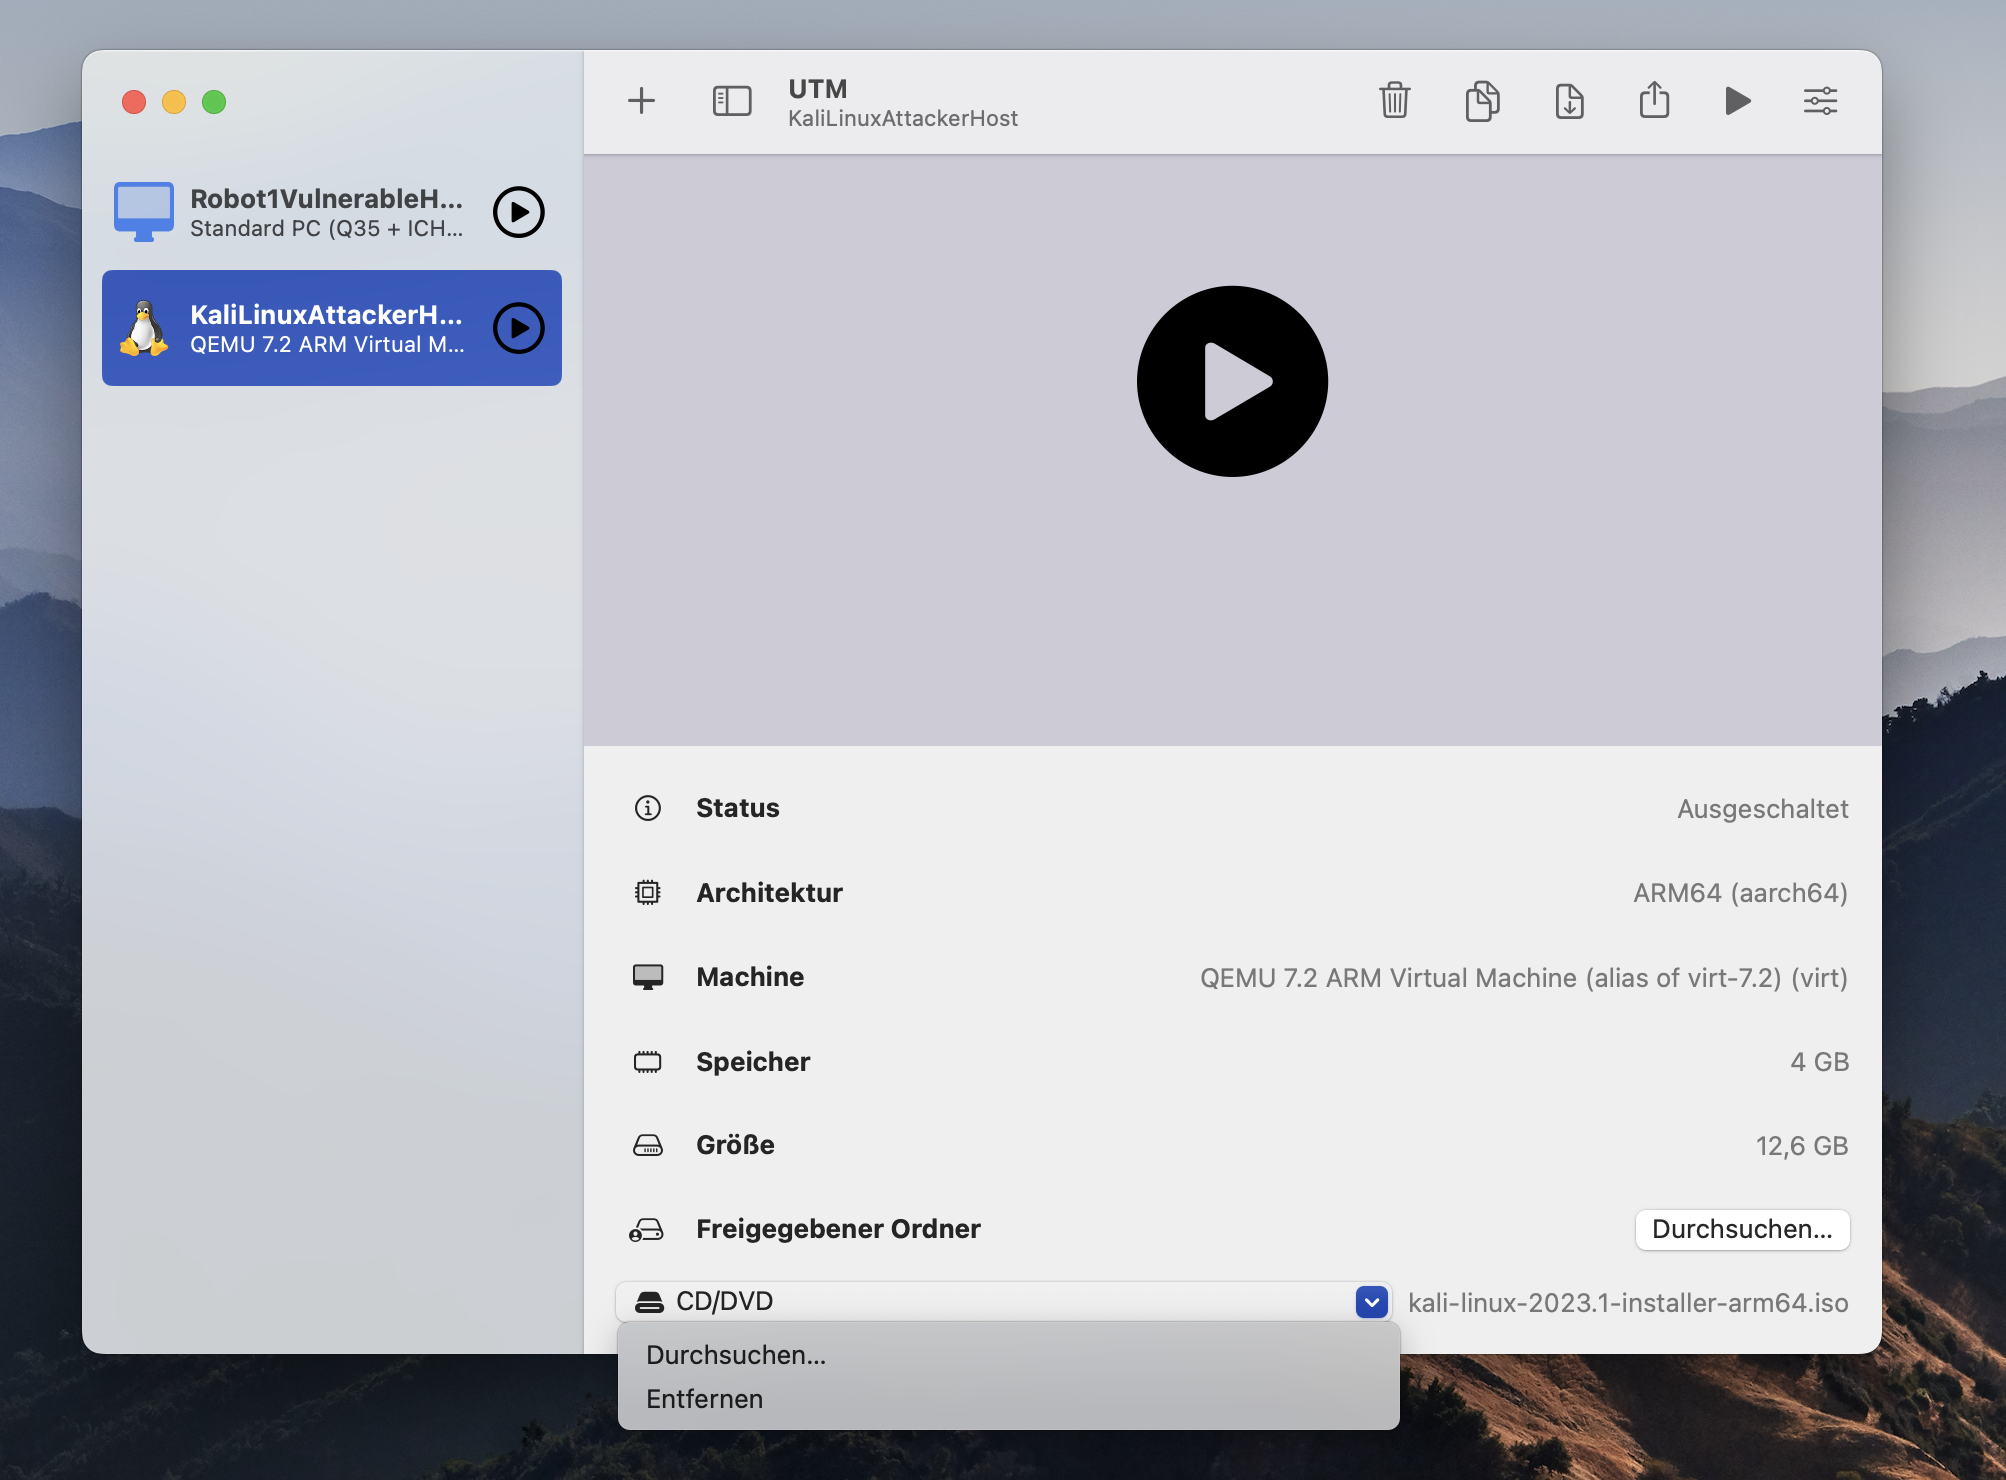
Then you go to the main window, select the virtual machine you just installed, go to the main window and unmount the iso at the bottom of the page.
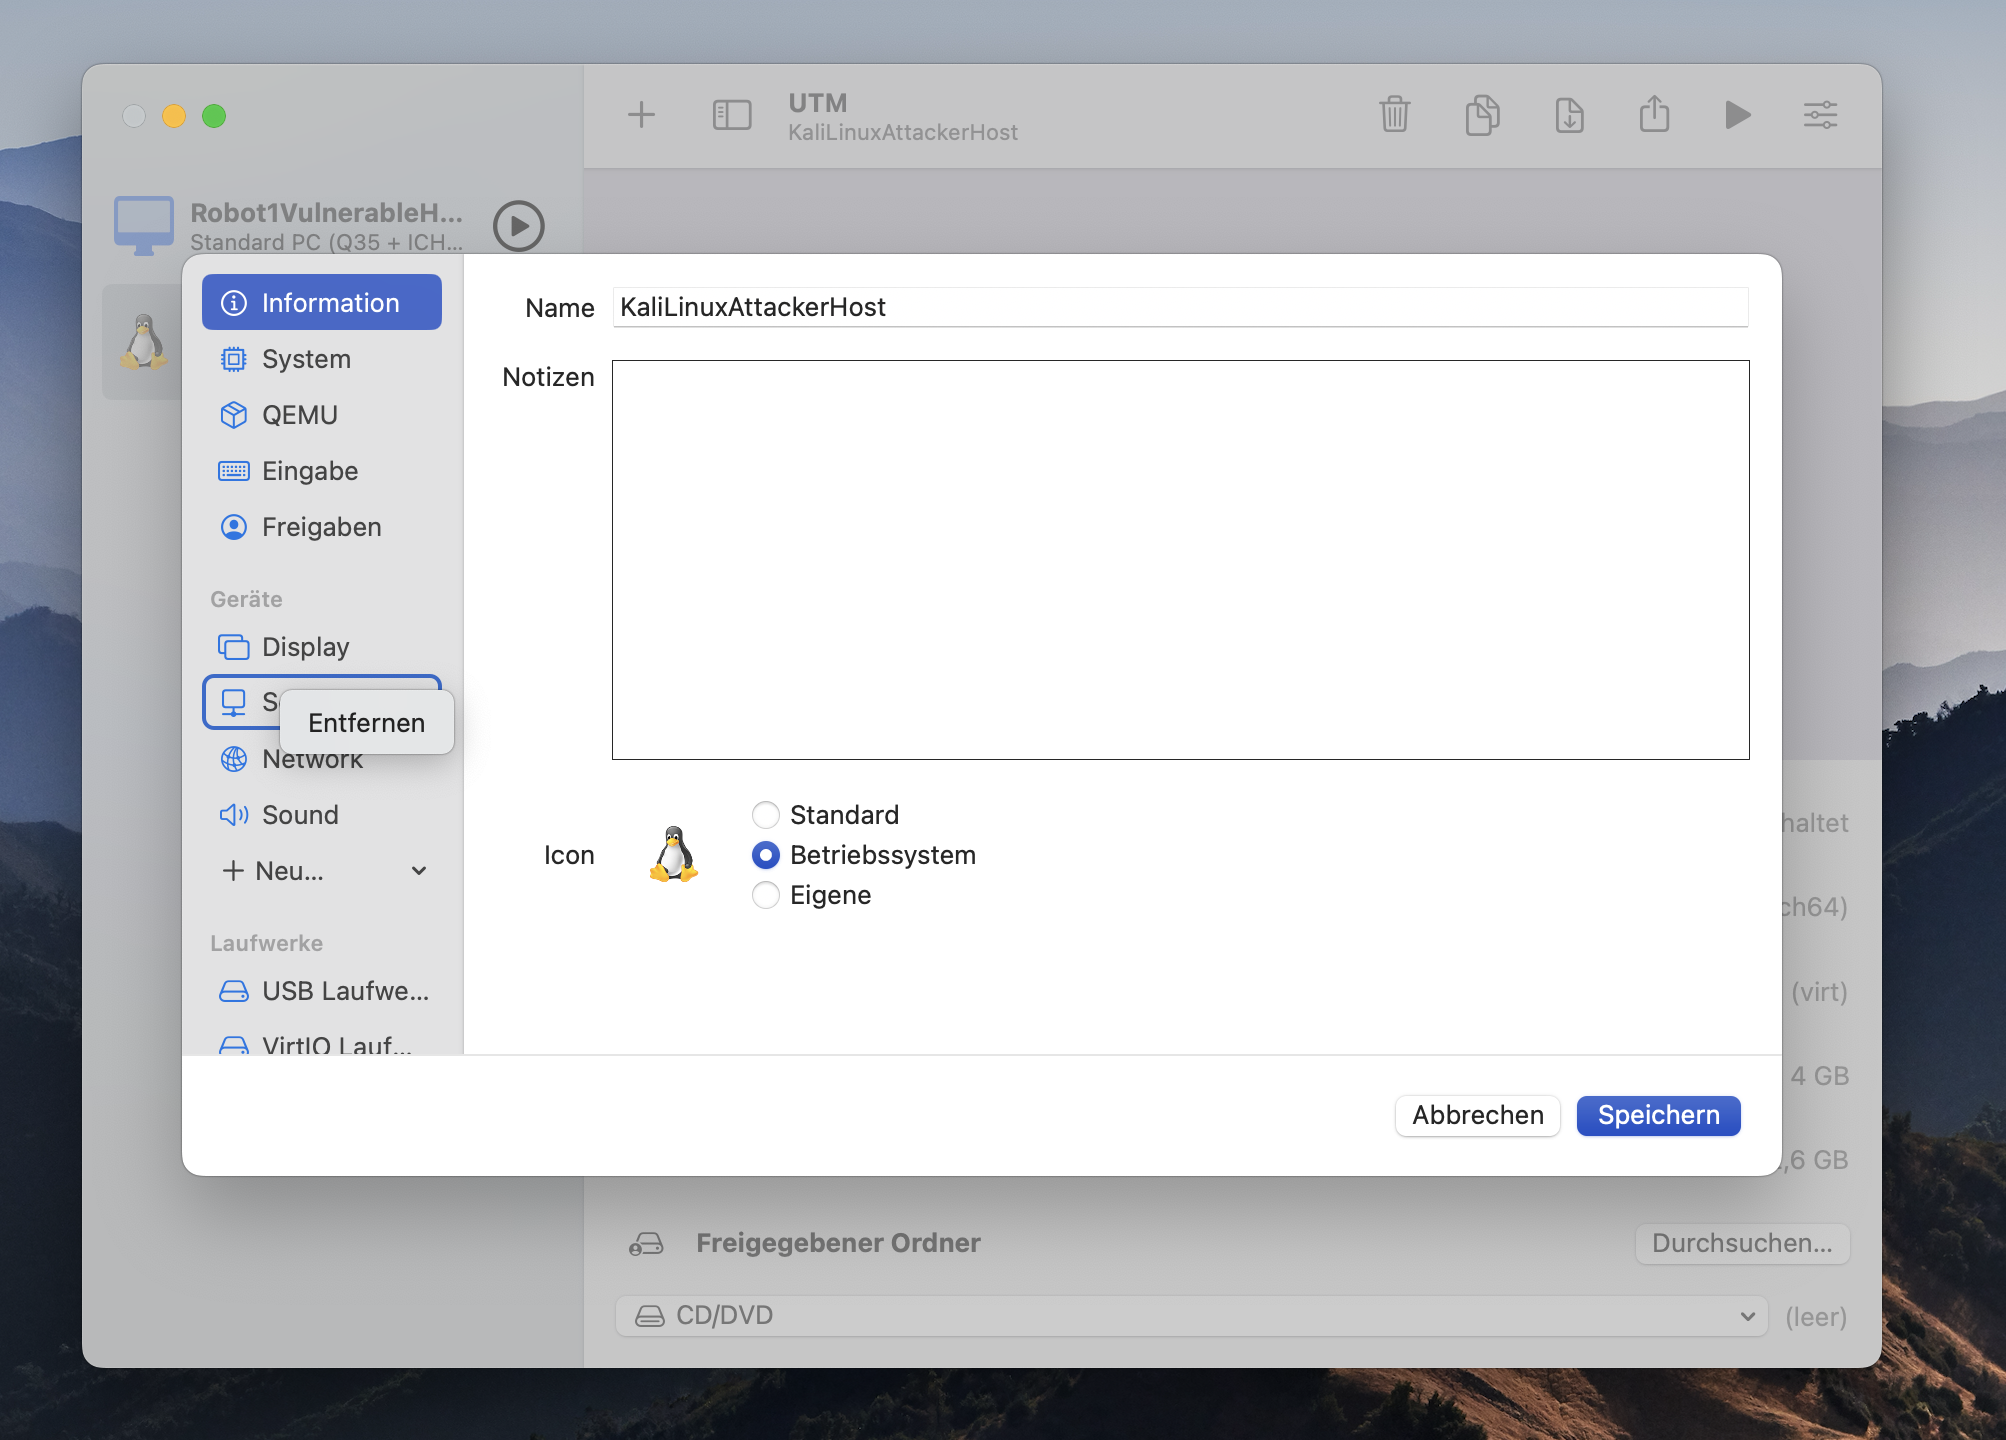
Open the settings and go to the device sections and remove the serial device you created before. To set the correct network settings go to Network section and select Host only. Finally you click on safe and end the configuration.
Check the network configuration
Run both virtual machines in UTM, Robot1VulnerableHost and the Attacker machine KaliLinux. When you run Robot1VulnerableHost you see the logon screen after the machine has beefed. Of course you don’t have login credentials because you want to hack into it instead of logging in. This is different on your KaliLinux. Here you created an account during the installation.
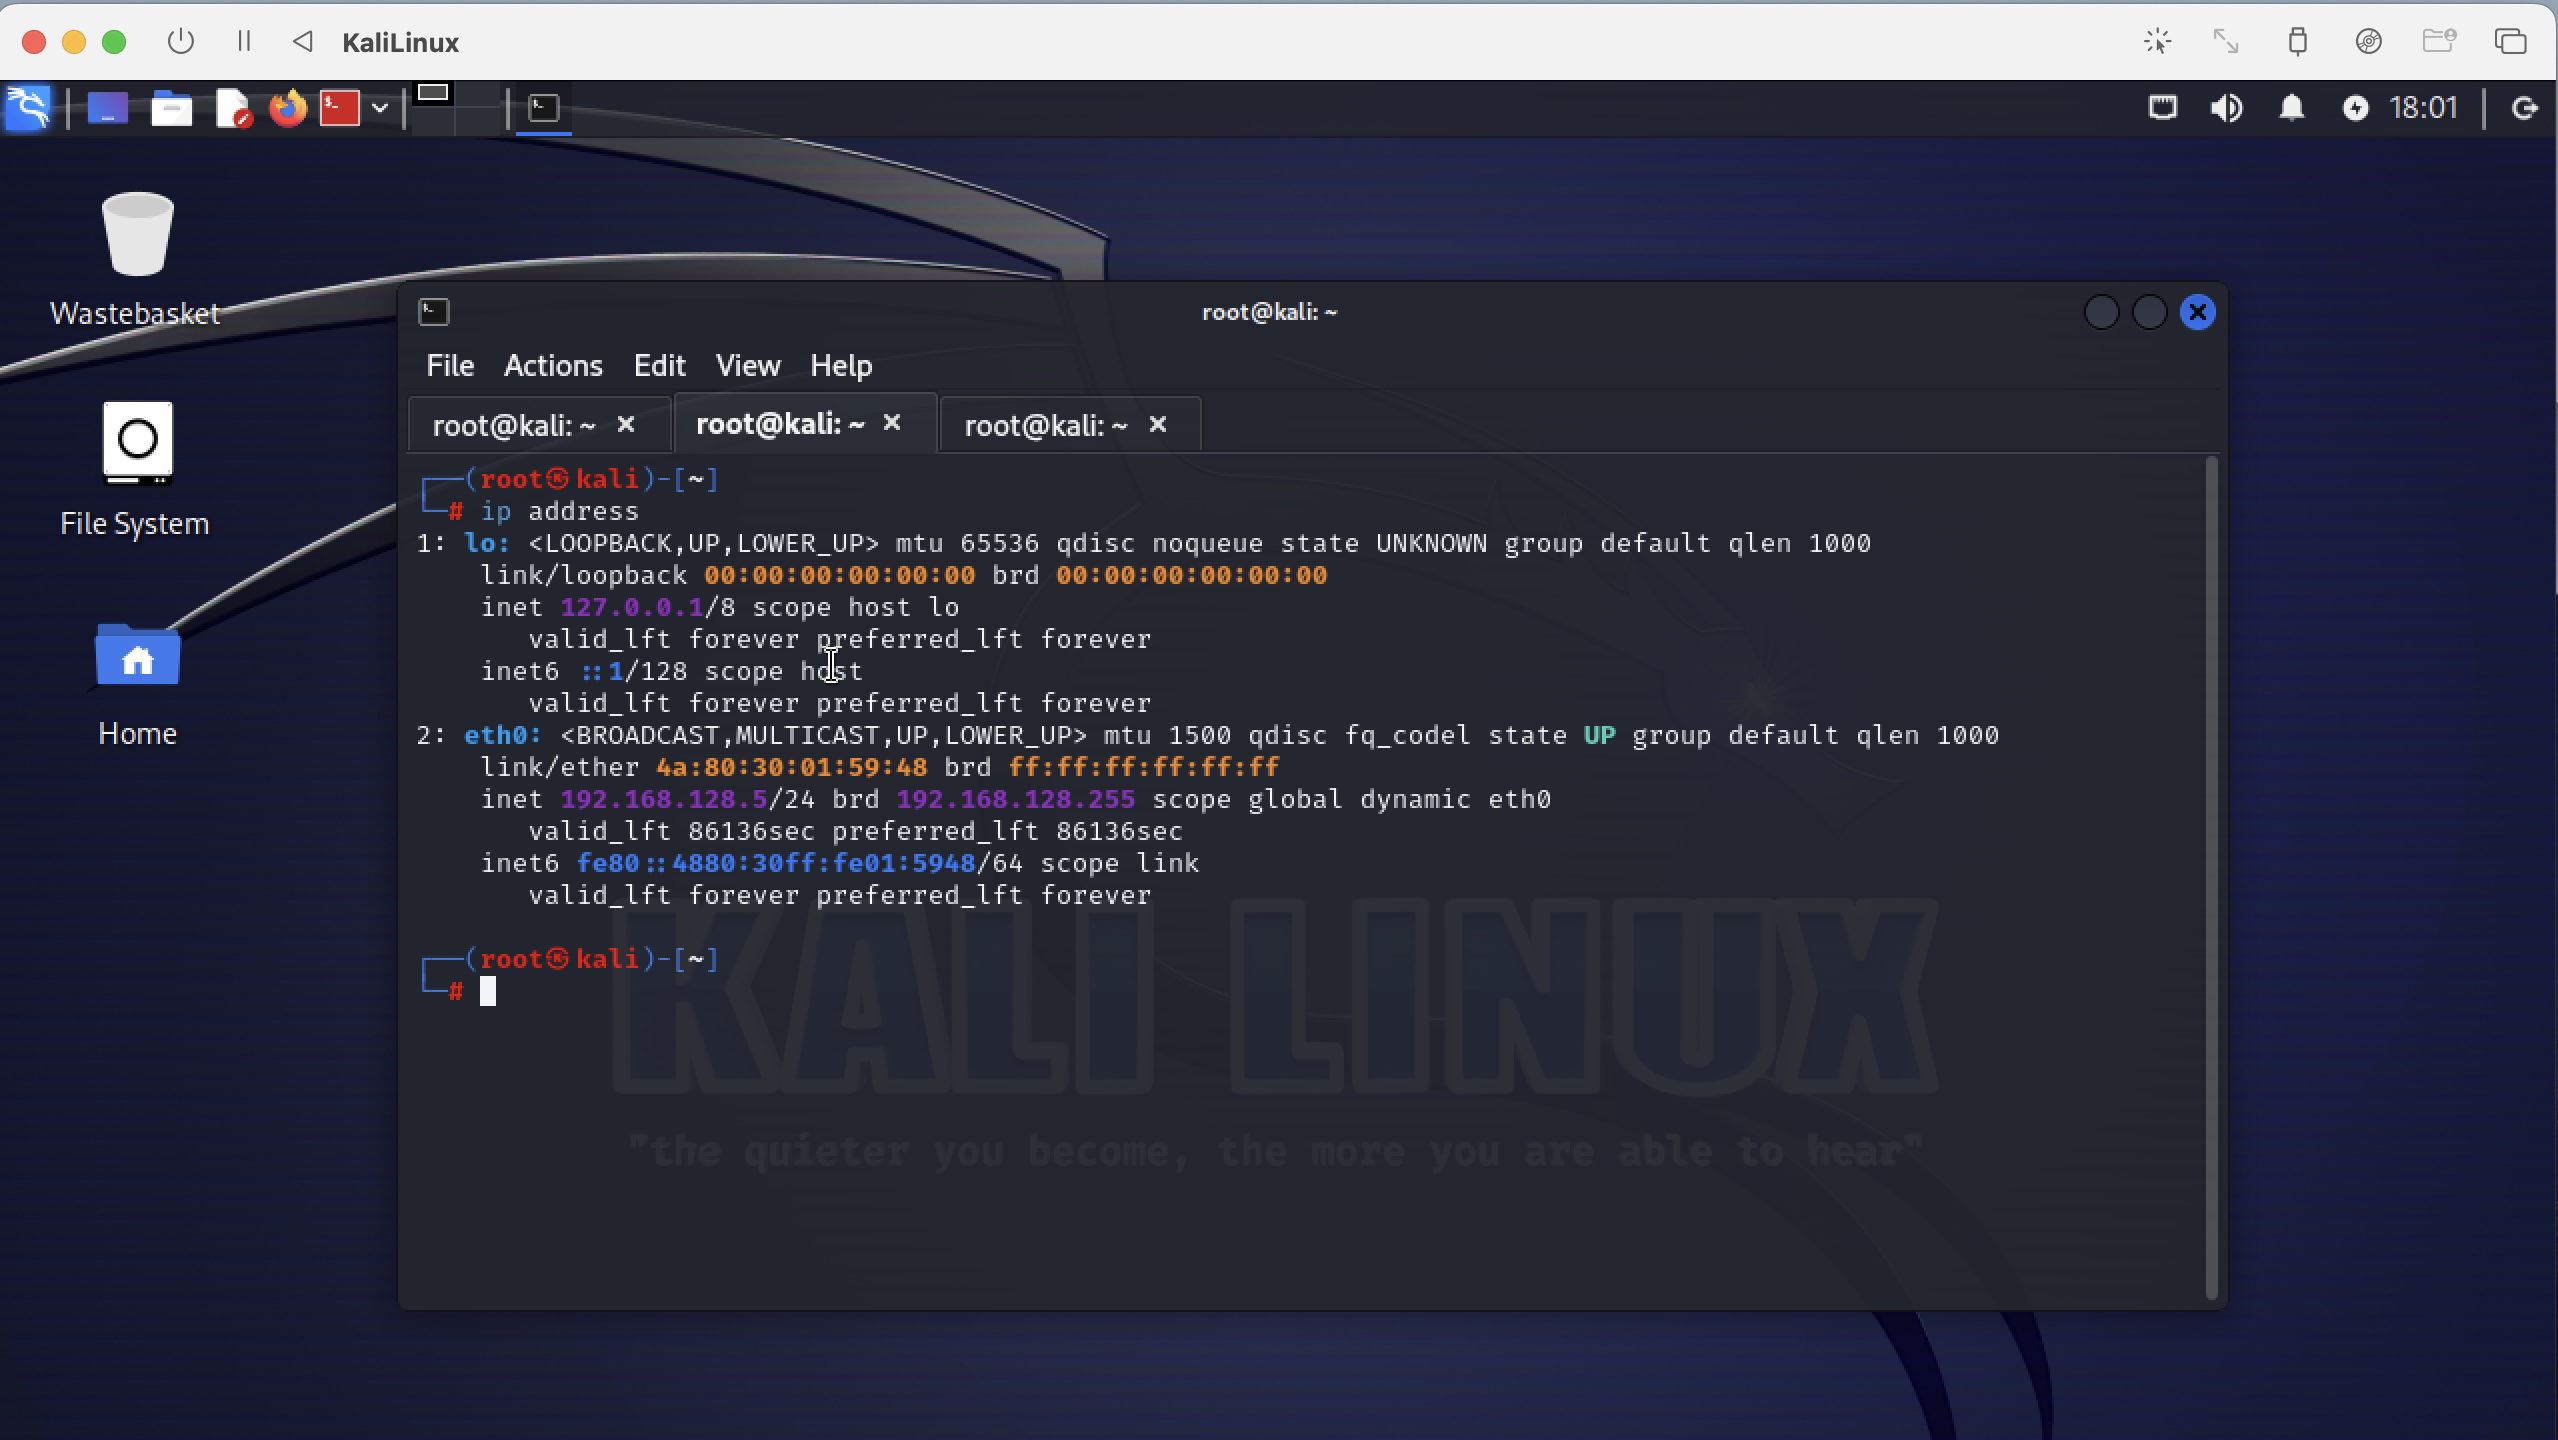
Log into KaliLinux and open a Terminal. Check the ip address from KaliLinux. The ip address is 192.168.128.5.
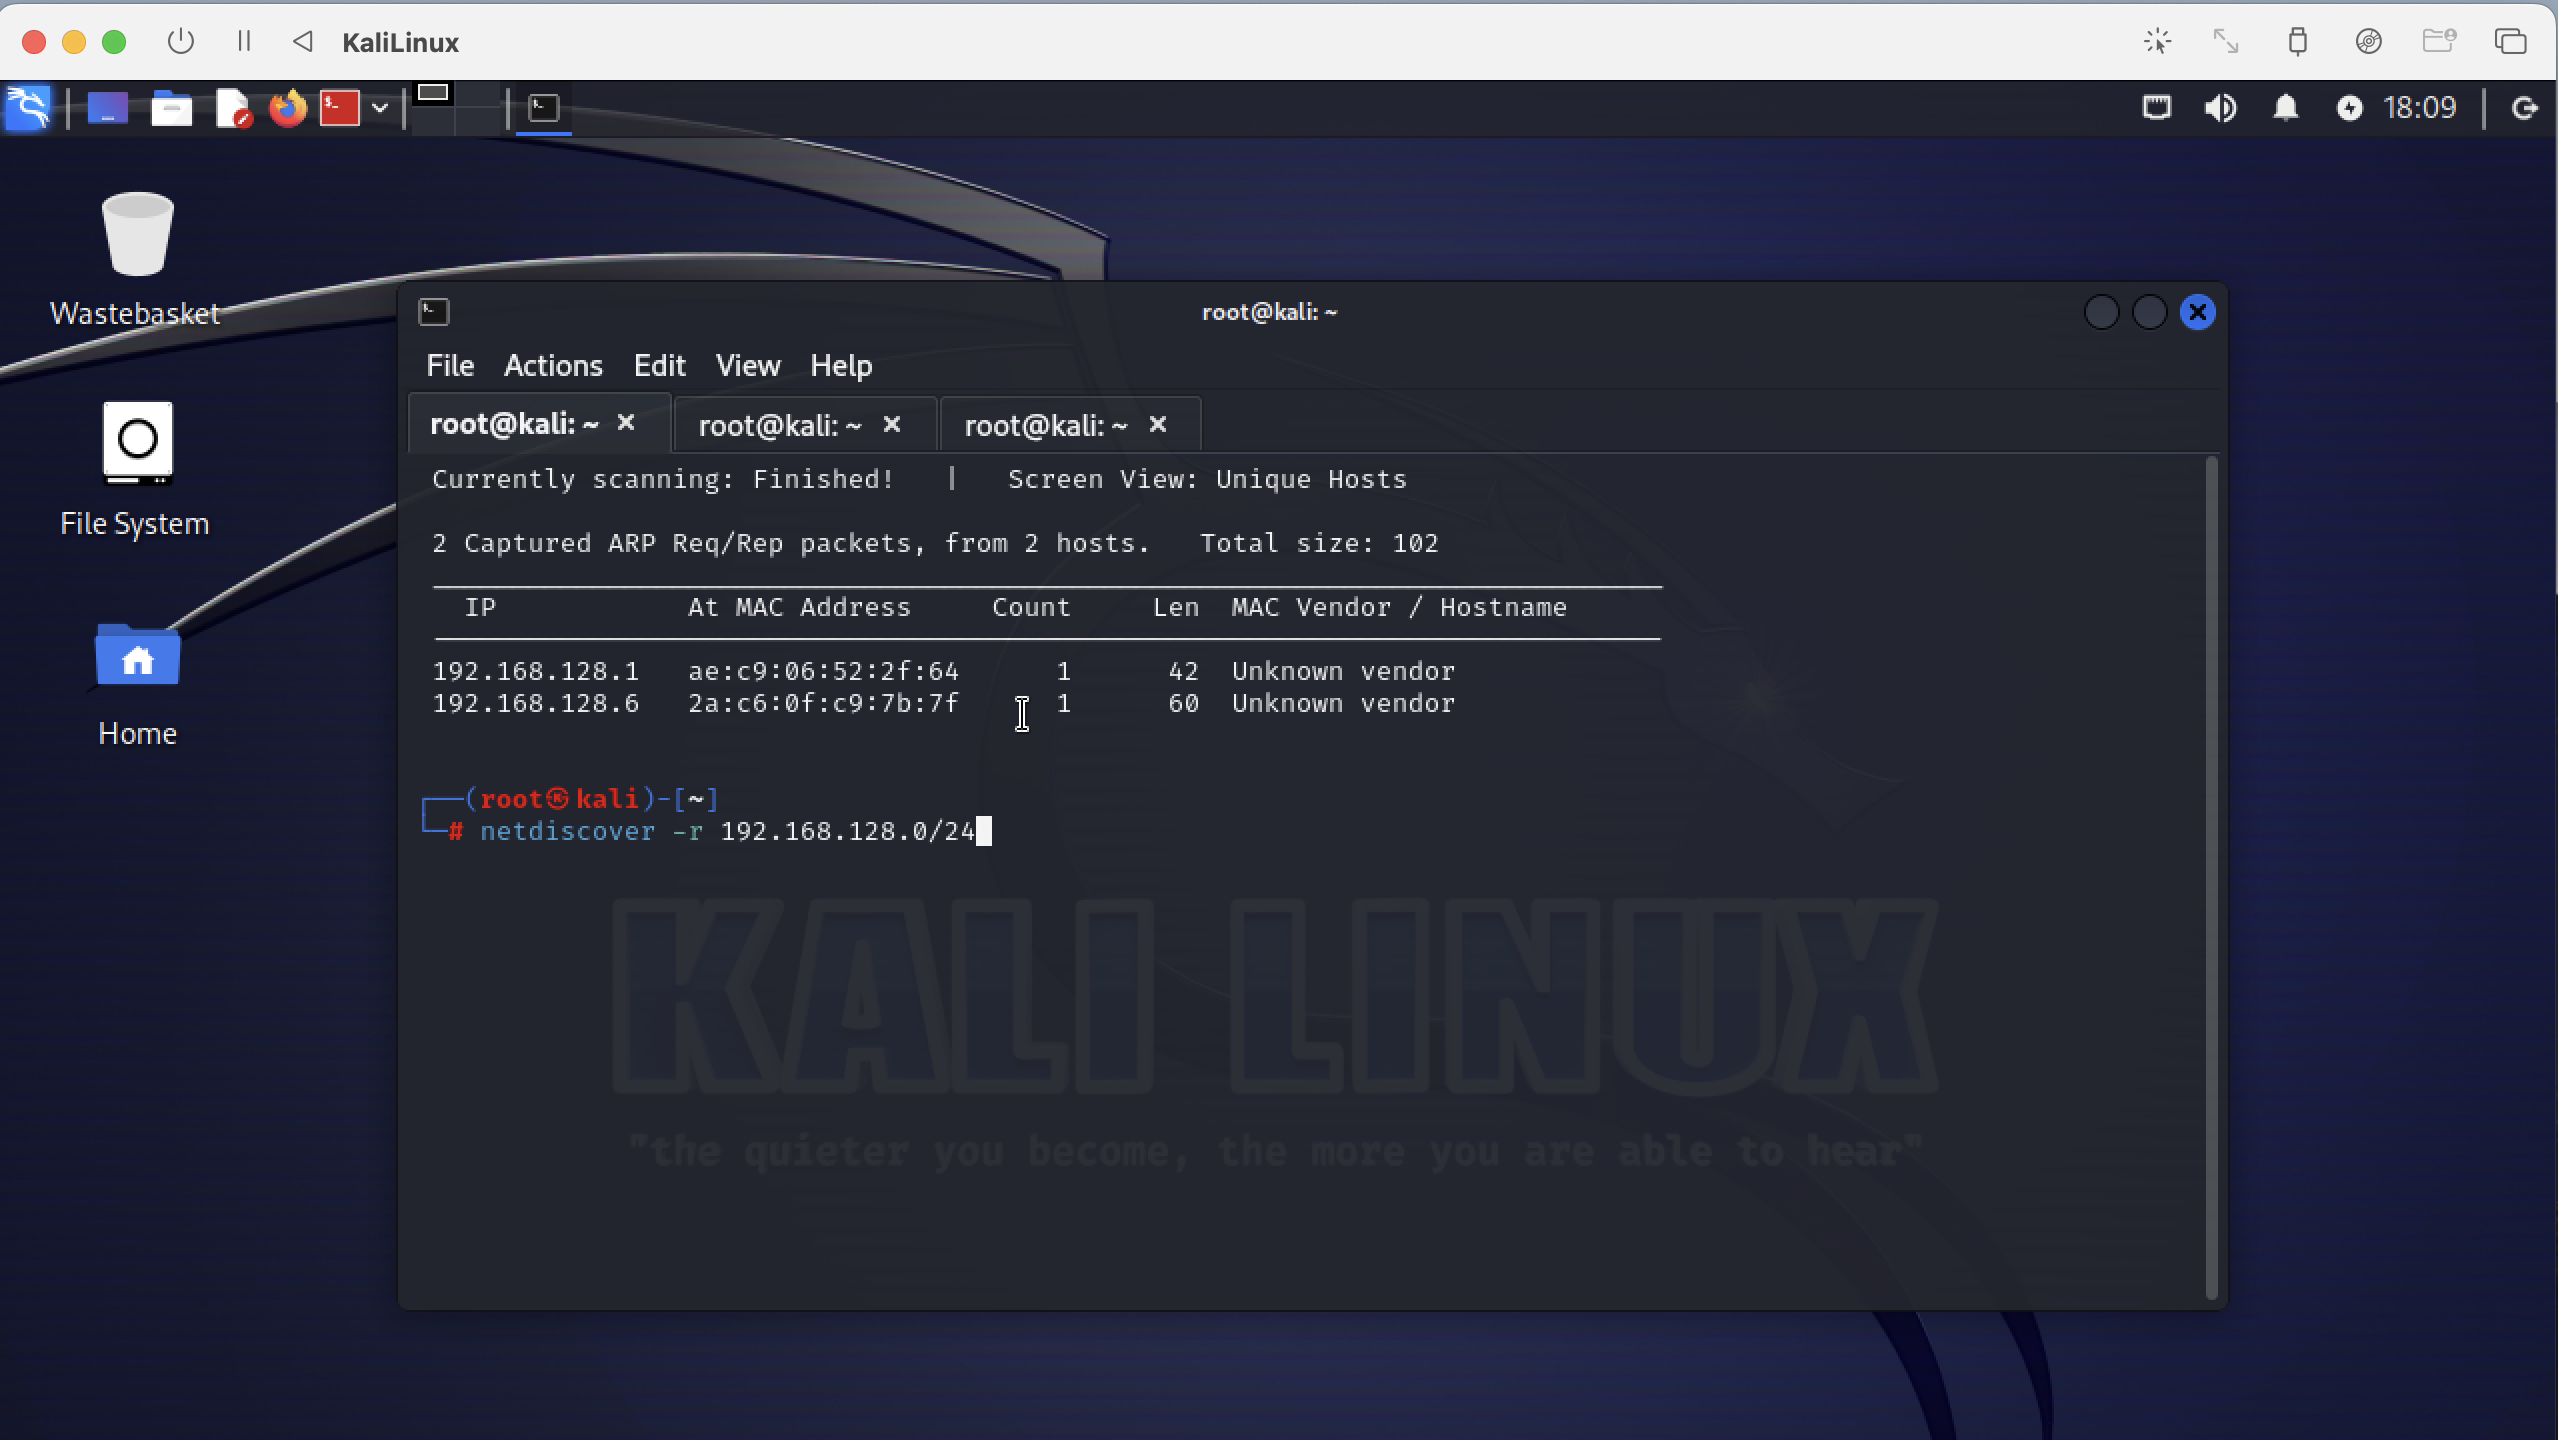
Then discover the network 192.168.128.0/24 to find other hosts in the same subnet. Type the following command.
kaliLinux % netdiscover -r 192.168.128.0/24
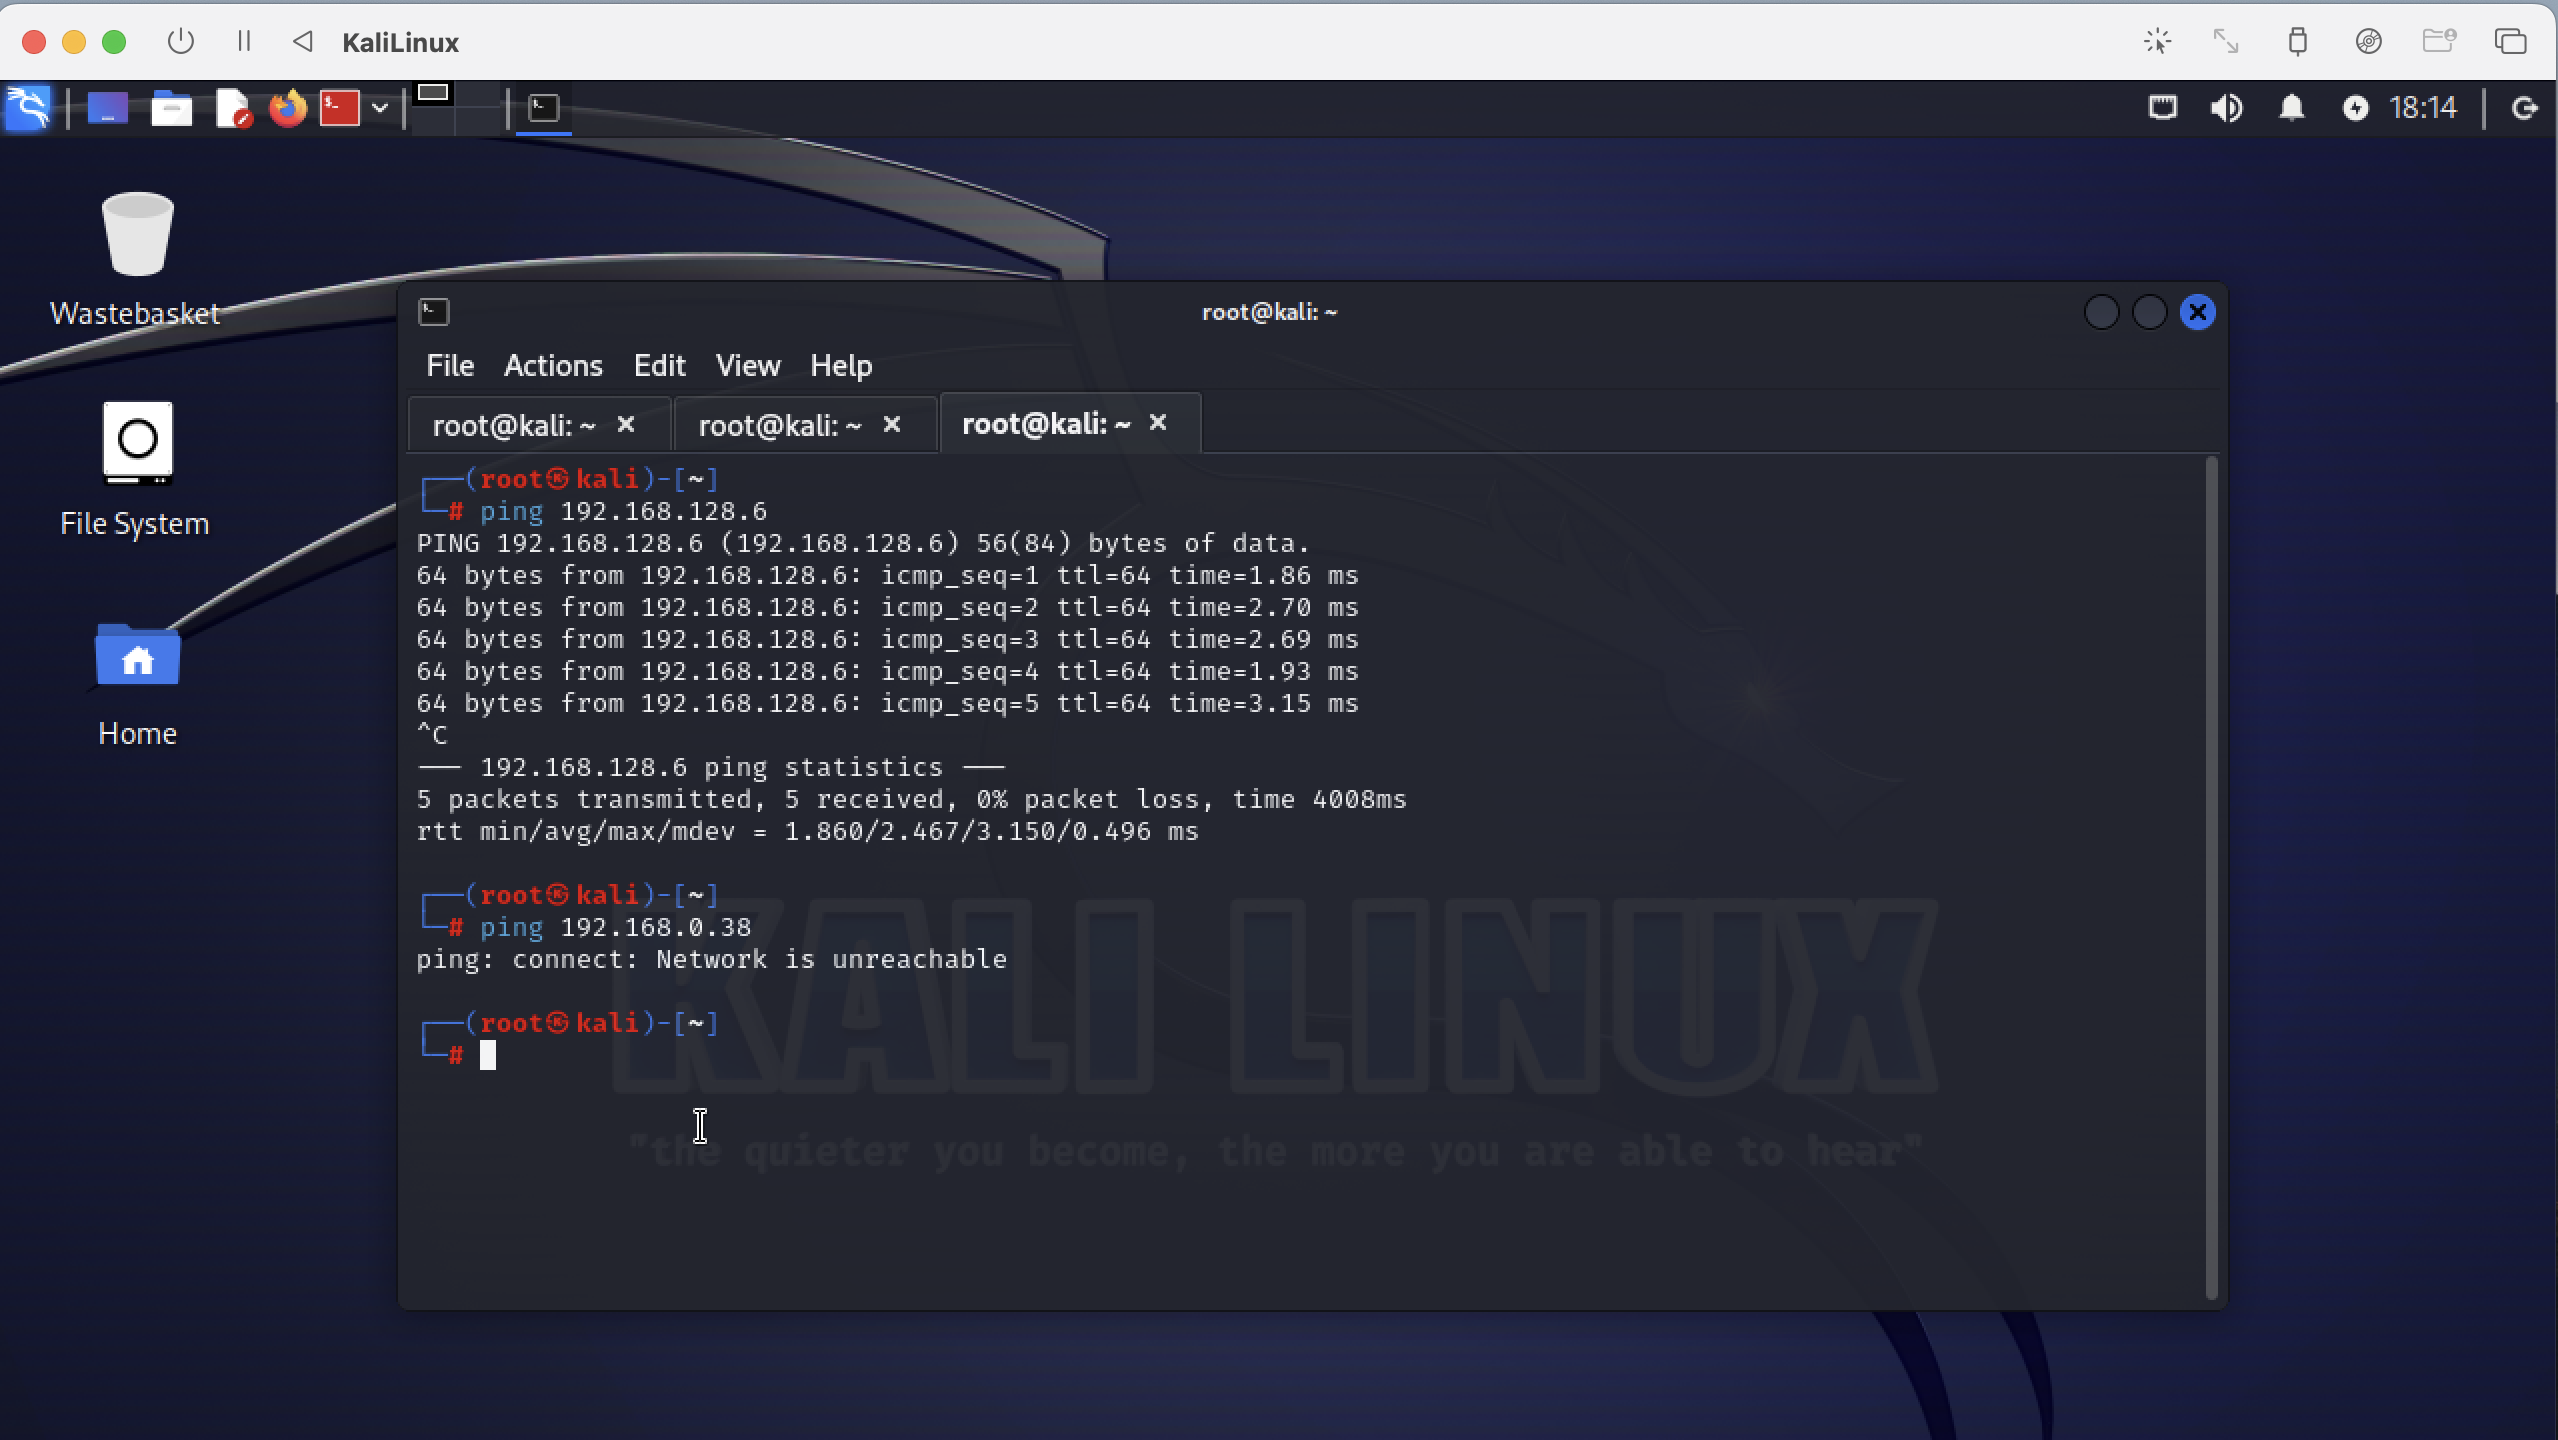
You see 2 hosts in your subnet 192.168.128.1 which is the bridge between your local host network and your vlan and you see 192.168.128.6 which is Robot1VulnerableHost on the same subnet.
You can ping Robot1VulnerableHost but you cannot ping the host computer which is my Mac on subnet 192.168.0.0/24 with the ip address 192.168.0.38. So the bridge does not route traffic from your vlan into the local network which is what we need. The guests can talk to each other but they can not talk to the outside world.
Then I ping the virtual guests from my Mac. Here you see the host can talk to them. So the network setup of the Hacking Lab is correct.
patrick % ping 192.168.128.5
PING 192.168.128.5 (192.168.128.5): 56 data bytes
64 bytes from 192.168.128.5: icmp_seq=0 ttl=64 time=0.979 ms
64 bytes from 192.168.128.5: icmp_seq=1 ttl=64 time=0.568 ms
64 bytes from 192.168.128.5: icmp_seq=2 ttl=64 time=0.811 ms
64 bytes from 192.168.128.5: icmp_seq=3 ttl=64 time=0.718 ms
^C

patrick % ping 192.168.128.6
PING 192.168.128.6 (192.168.128.6): 56 data bytes
64 bytes from 192.168.128.6: icmp_seq=0 ttl=64 time=2.663 ms
64 bytes from 192.168.128.6: icmp_seq=1 ttl=64 time=2.298 ms
64 bytes from 192.168.128.6: icmp_seq=2 ttl=64 time=2.330 ms
64 bytes from 192.168.128.6: icmp_seq=3 ttl=64 time=2.310 ms
64 bytes from 192.168.128.6: icmp_seq=4 ttl=64 time=2.318 ms
^C

patrick %